When version 2.92 of Blender was released, it included a new feature: Geometry Nodes. It is the first feature of the “everything nodes” initiative for the software, and it allows manipulation and creation of geometry through a node graph attached to a mesh. Version 2.93 added more geometry nodes, and I presume that subsequent versions will continue to expand this feature.
I decided to learn the basics of Geometry Nodes by creating a simple animation. Of course, the “simple scene” became more complicated than I expected, but I am very happy with the result.
Here is the final video. Note: you can right-click on the video and select “Loop” to view it continuously.
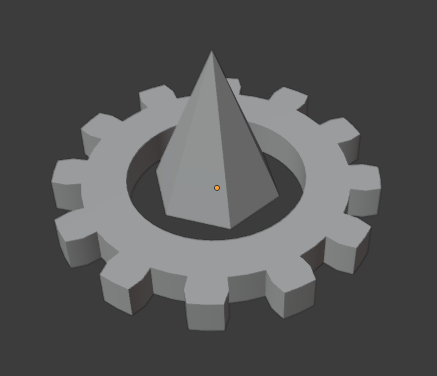
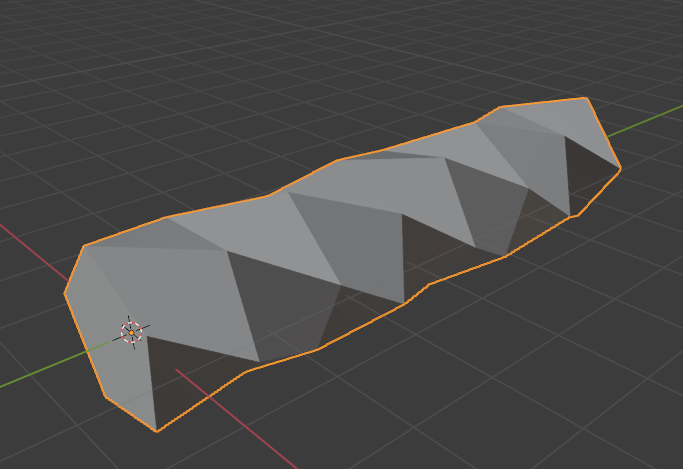
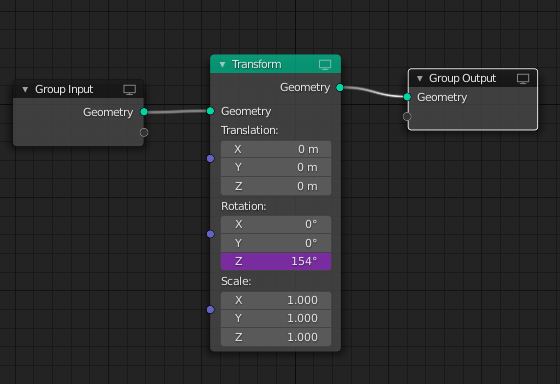
There is only one gear mesh, which is instanced over a deformed cylinder using Geometry Nodes.
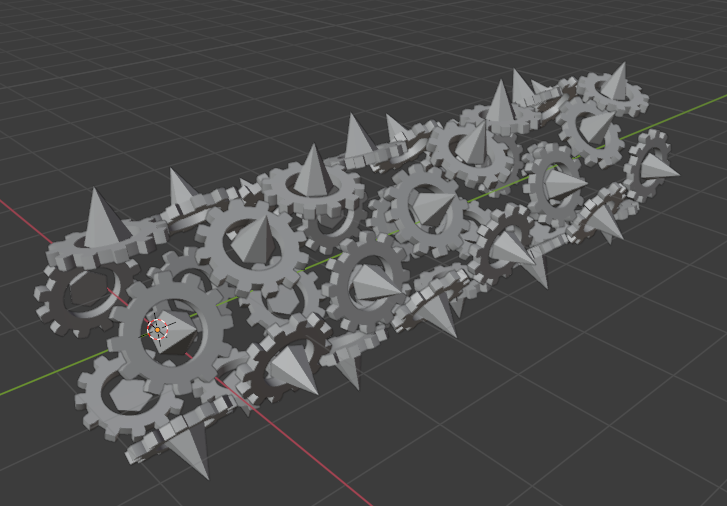
Blender has built-in instancing that allows creating one mesh at all of the points of another mesh, as I am doing here. However, each instance will be aligned in the same direction; in this case, all of the gears would point straight up, instead of radiating out from the cylinder’s central axis.
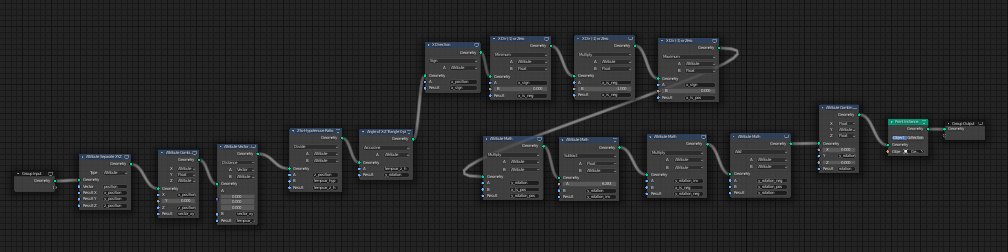
Using geometry nodes allowed me to instance the gears and adjust the rotation, using a long series of nodes to perform some vector math.
I also had to create a very simple geometry node on the gear, so that I could rotate the gear around it’s Z (up/down) axis over time. The purple field in the Transform node indicates a driver (similar to a Set Driven Key in Maya, or an Expression in LightWave).
Apart from the cylinder and gear, I also added the sphere in the center of the scene, two volumetric containers for atmosphere, and two area lights.
The sphere added a little challenge. I originally created the sphere using a simple shader that rendered quickly:
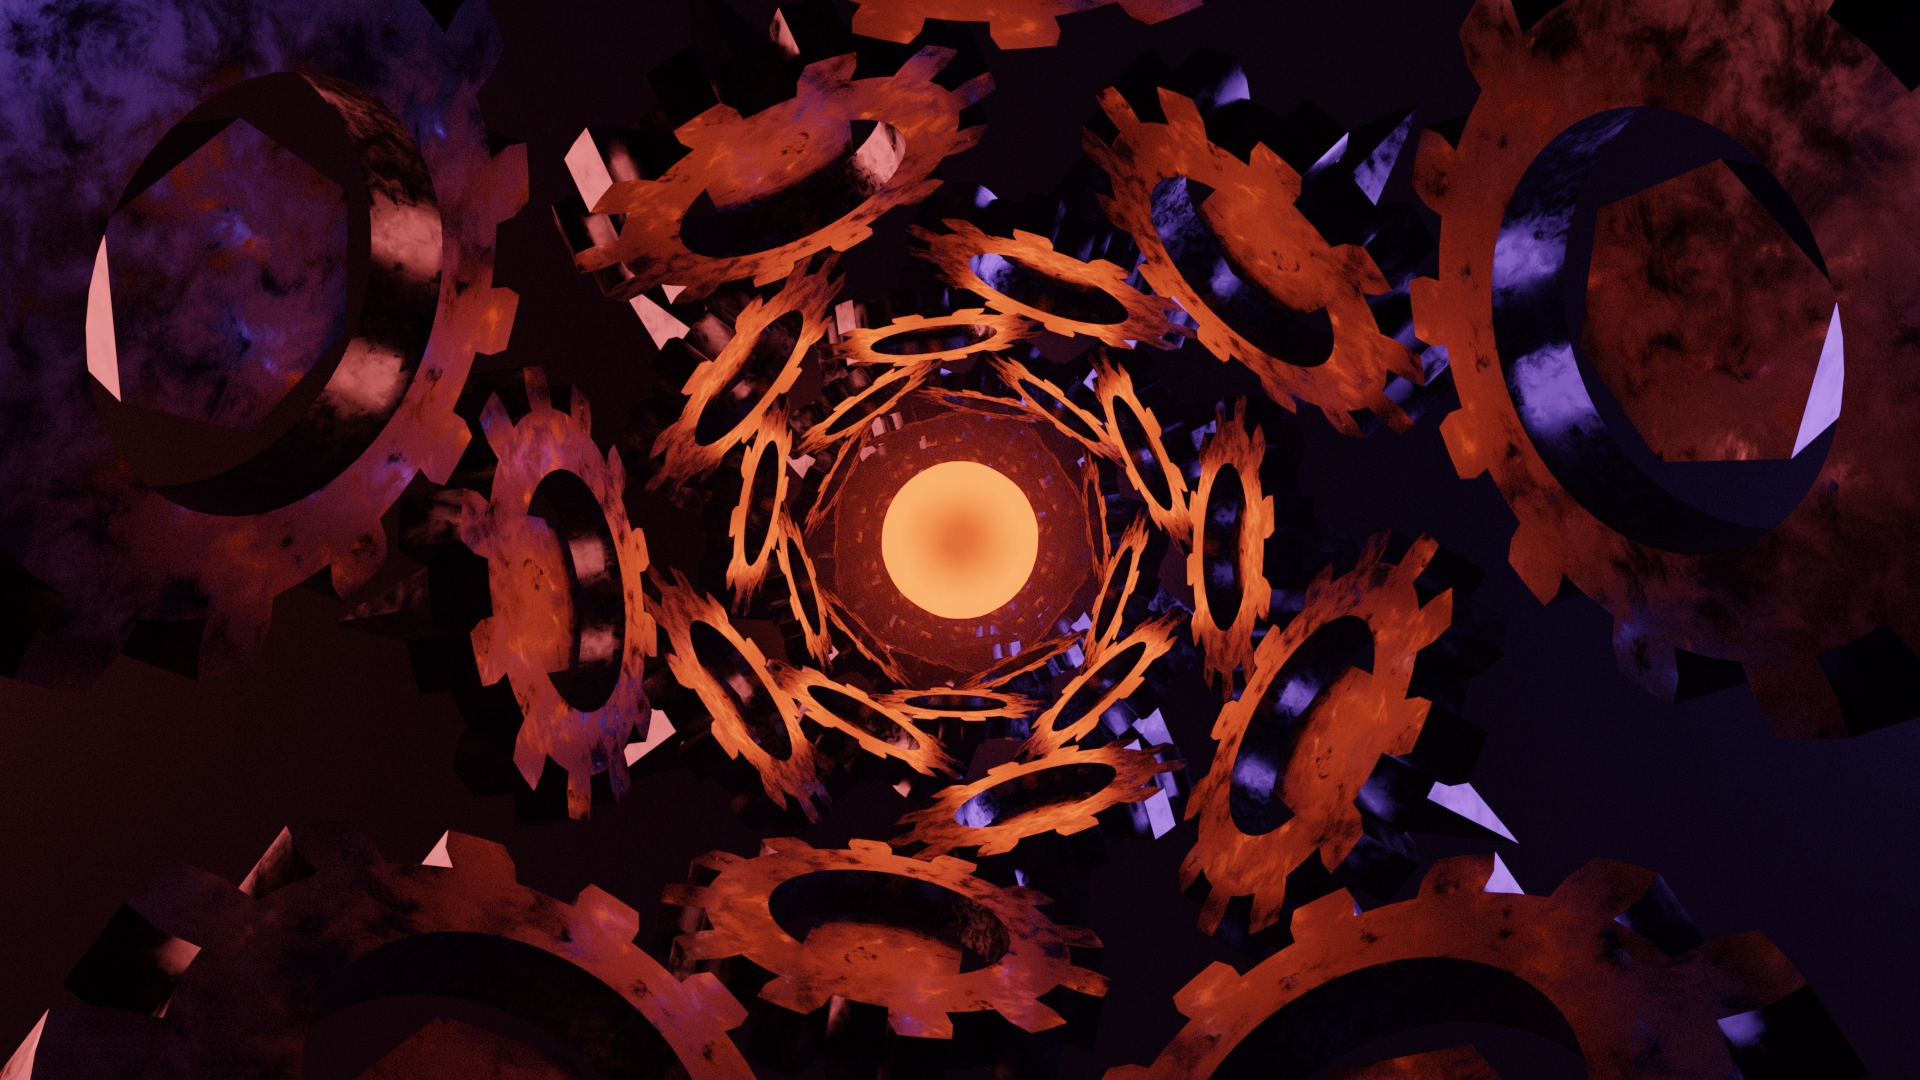
But when I decided to try a more advanced shader on the sphere, my render time shot up dramatically: from about two minutes per frame to over 15 minutes. The sphere is emissive, so it adds light to the scene. The new shader also used volumetrics, and the combination was very noisy unless I turned up the render samples significantly.
So I rendered out the frames using the simple sphere as my base render. Then I rendered out the scene with the new sphere, with a much higher sample rate, but used the “Render region” feature in Blender to only render the central section (the sphere and a little surrounding area that fits into a rectangle), which only took about two minutes per frame even with the high sample rate. Finally, I composited the two together in DaVinci Resolve for the final render!