One of the more interesting effects in 3D programs is volumetrics, which gives the ability to add mist, fog, atmosphere, god rays, and more to a scene. When I played around with LightWave and Maya in the past, I experimented with volumetrics but they came with a cost: significantly increased render times.
I started playing with some volumetric solutions in Blender 3D and unfortunately that cost has not gone away. When using full-blown volumetric effects, the render times go up 10 times or more.
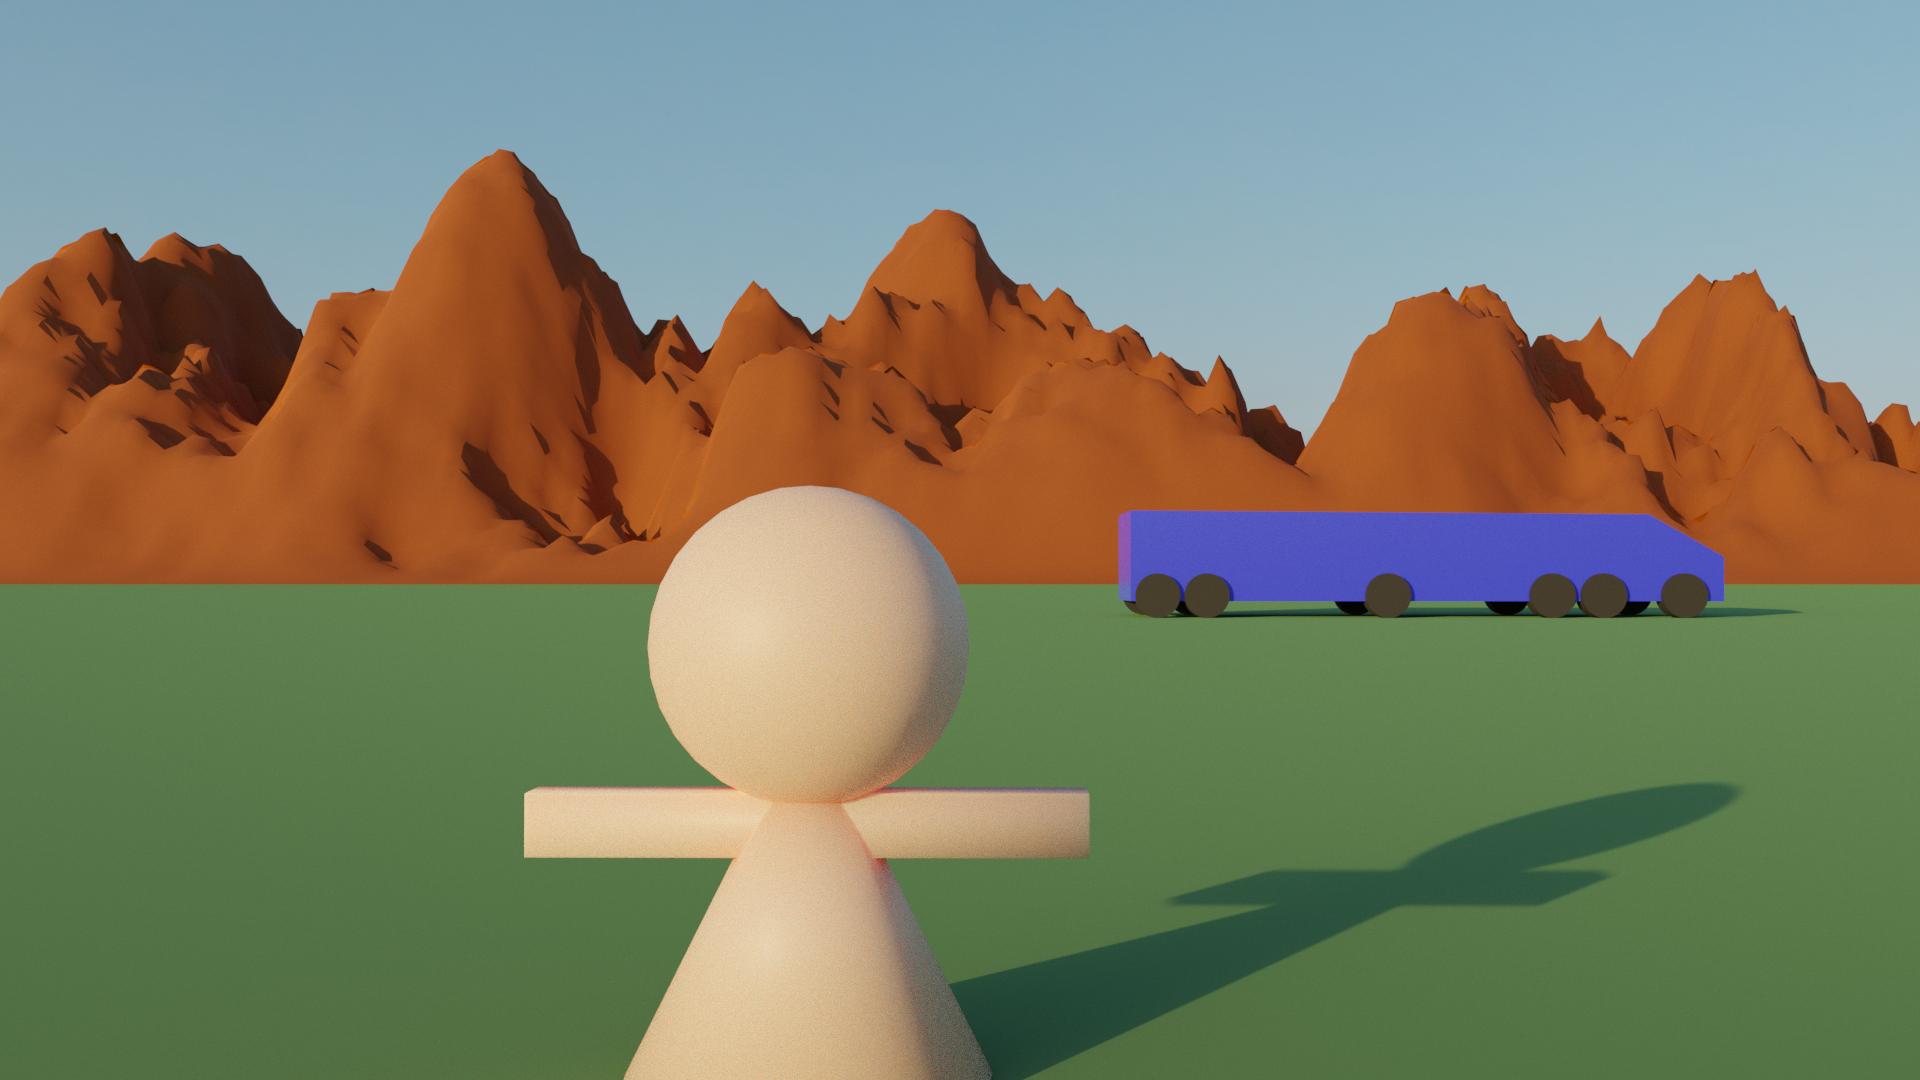
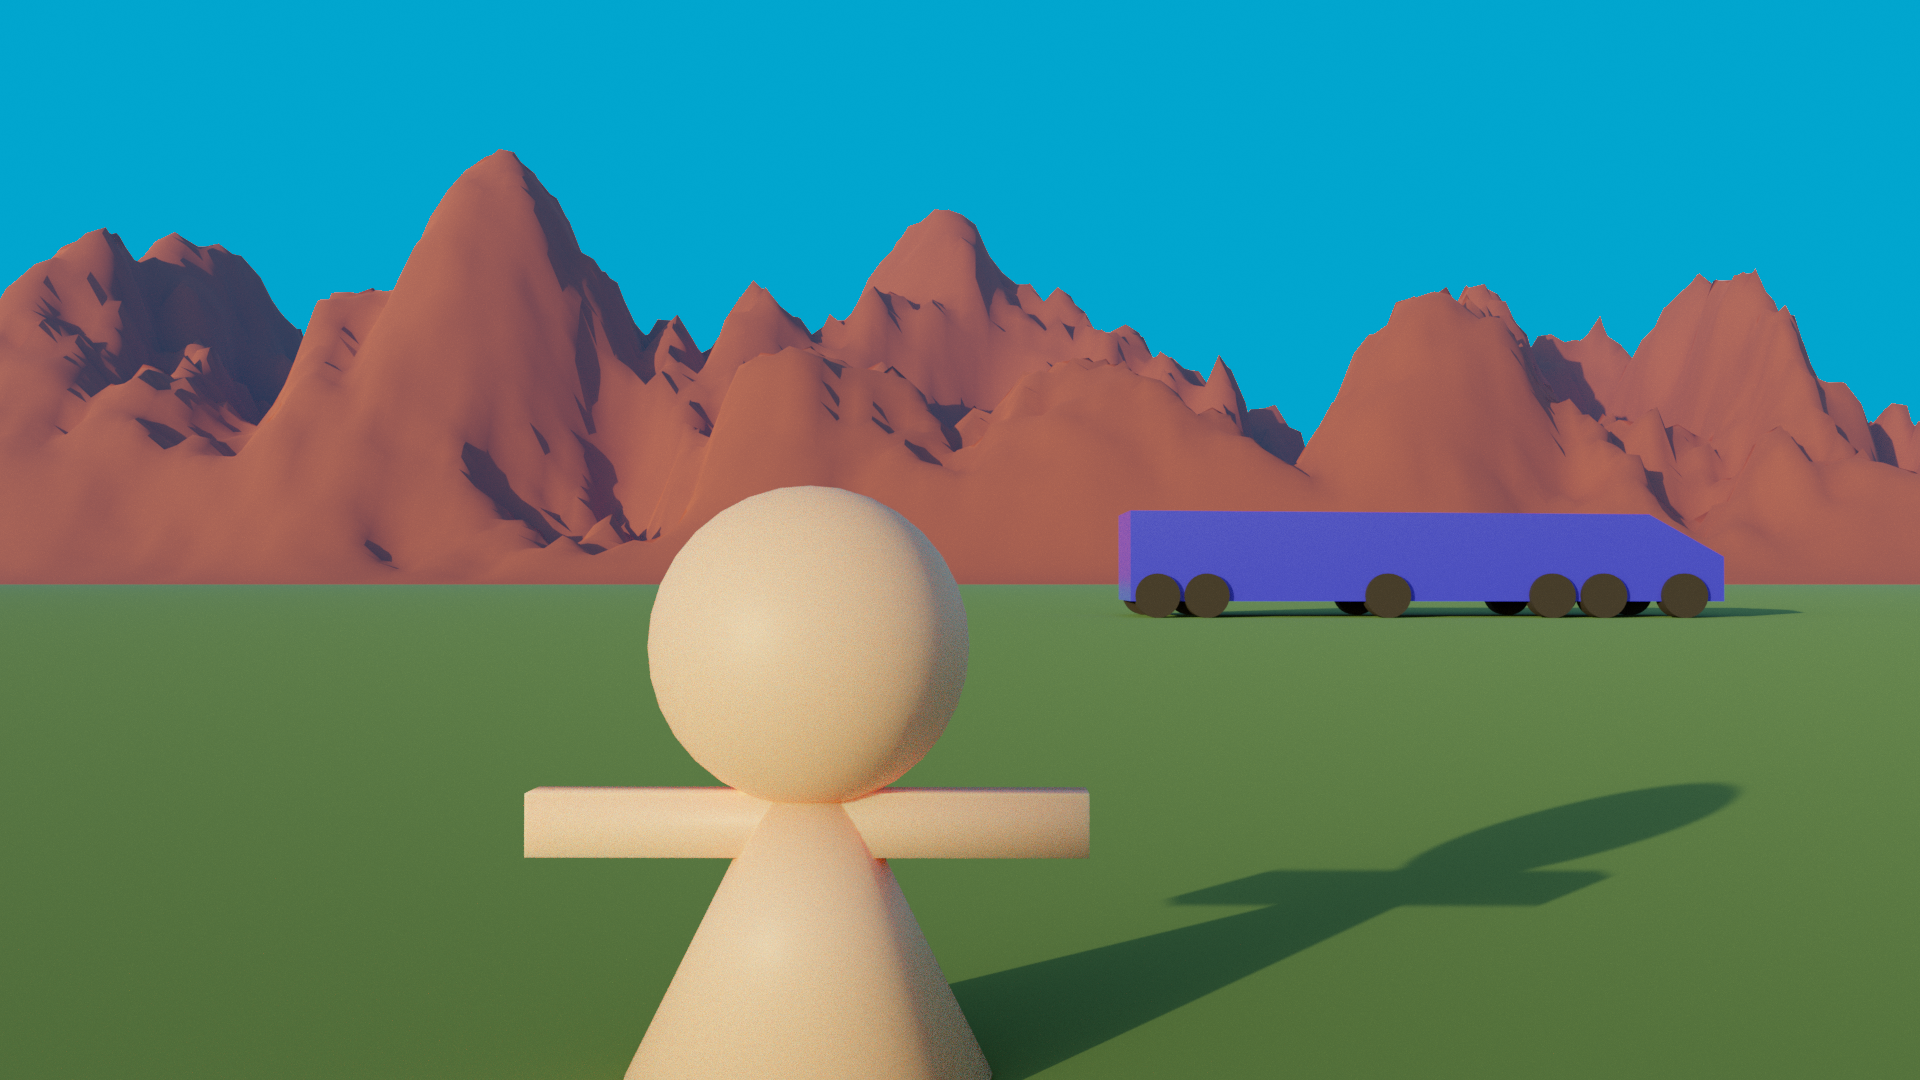
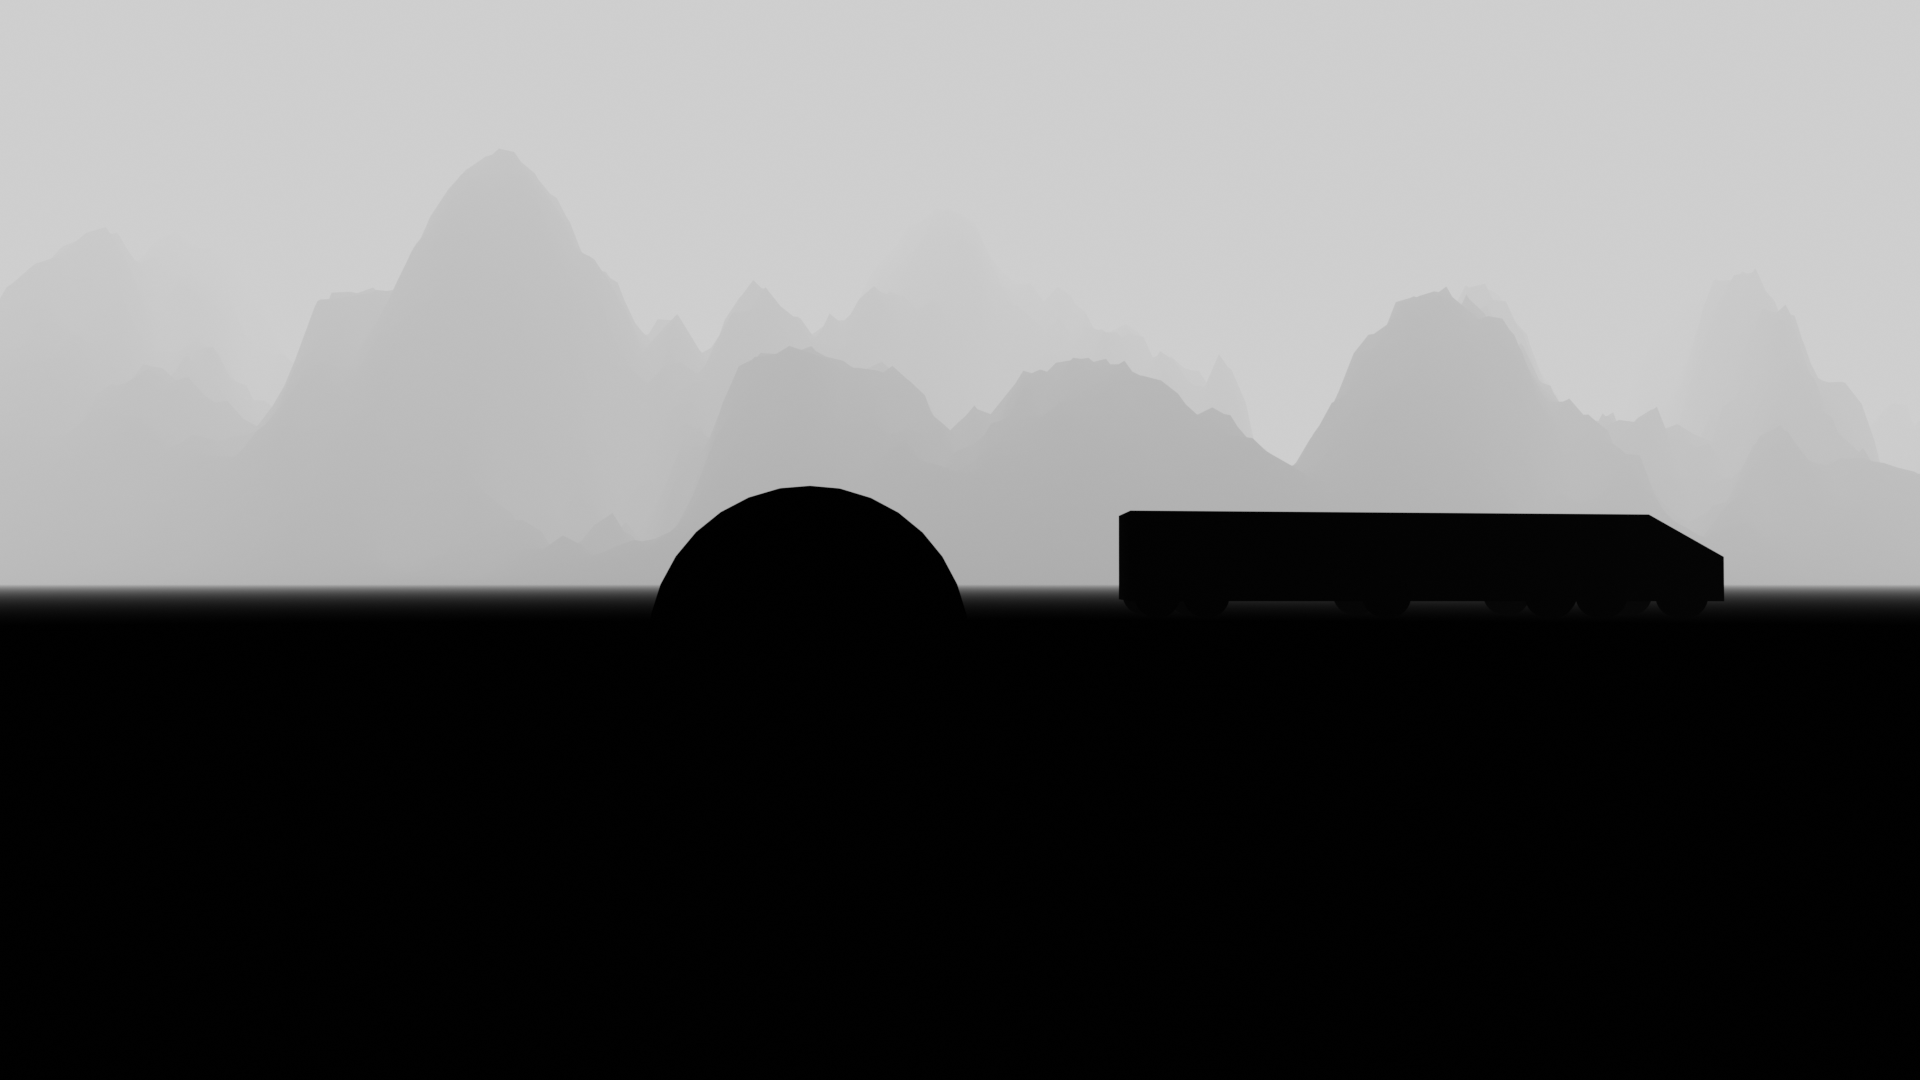
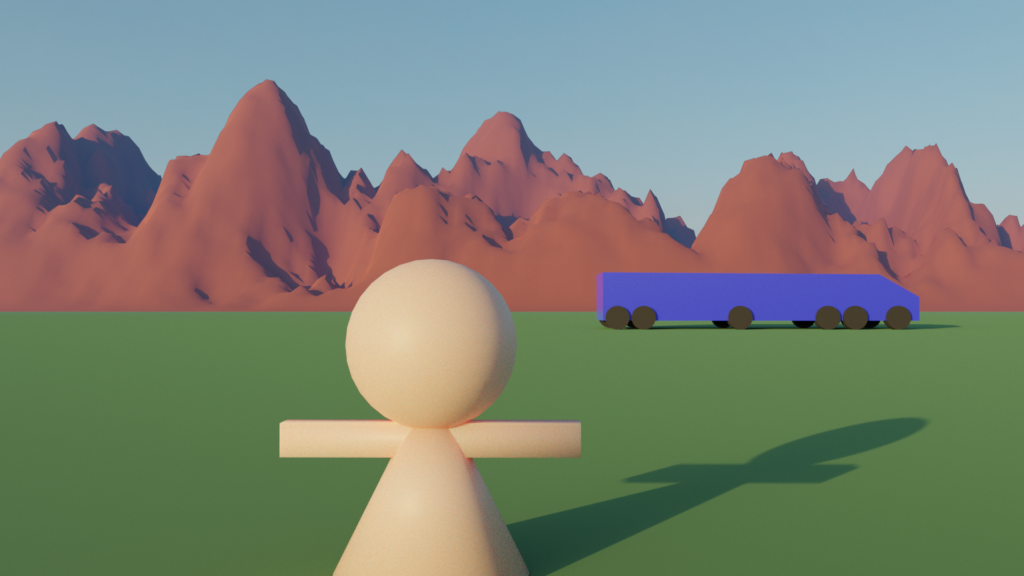
In this first look at volumetrics, I am limiting my experiments to a quick outdoor scene I created, where I attempt to add an atmospheric light-scattering effect.
The Scene
I whipped this together pretty quickly, so don’t expect anything fancy! I added a very large green plane for the ground and some quickly created objects for the background, mid-ground, and foreground. I lit the scene using only an HRDI image from HDRI Haven (a quarry image) and rendered all images using Cycles.
Shader – Volume Scatter Node
For my first attempt at adding some atmospheric scattering to the scene, I added a very large cube that enclosed everything in front of the camera and assigned a new material to it.
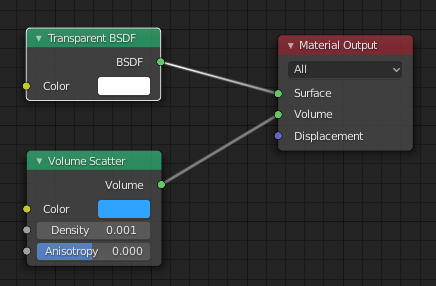
I added the Transparent BSDF node to hide the faces of the cube, and the Volume Scattering node handles the actual volumetric information inside the cube. You should set the Color to a sky-blue, so that objects in the distance will appear to fade into your background.
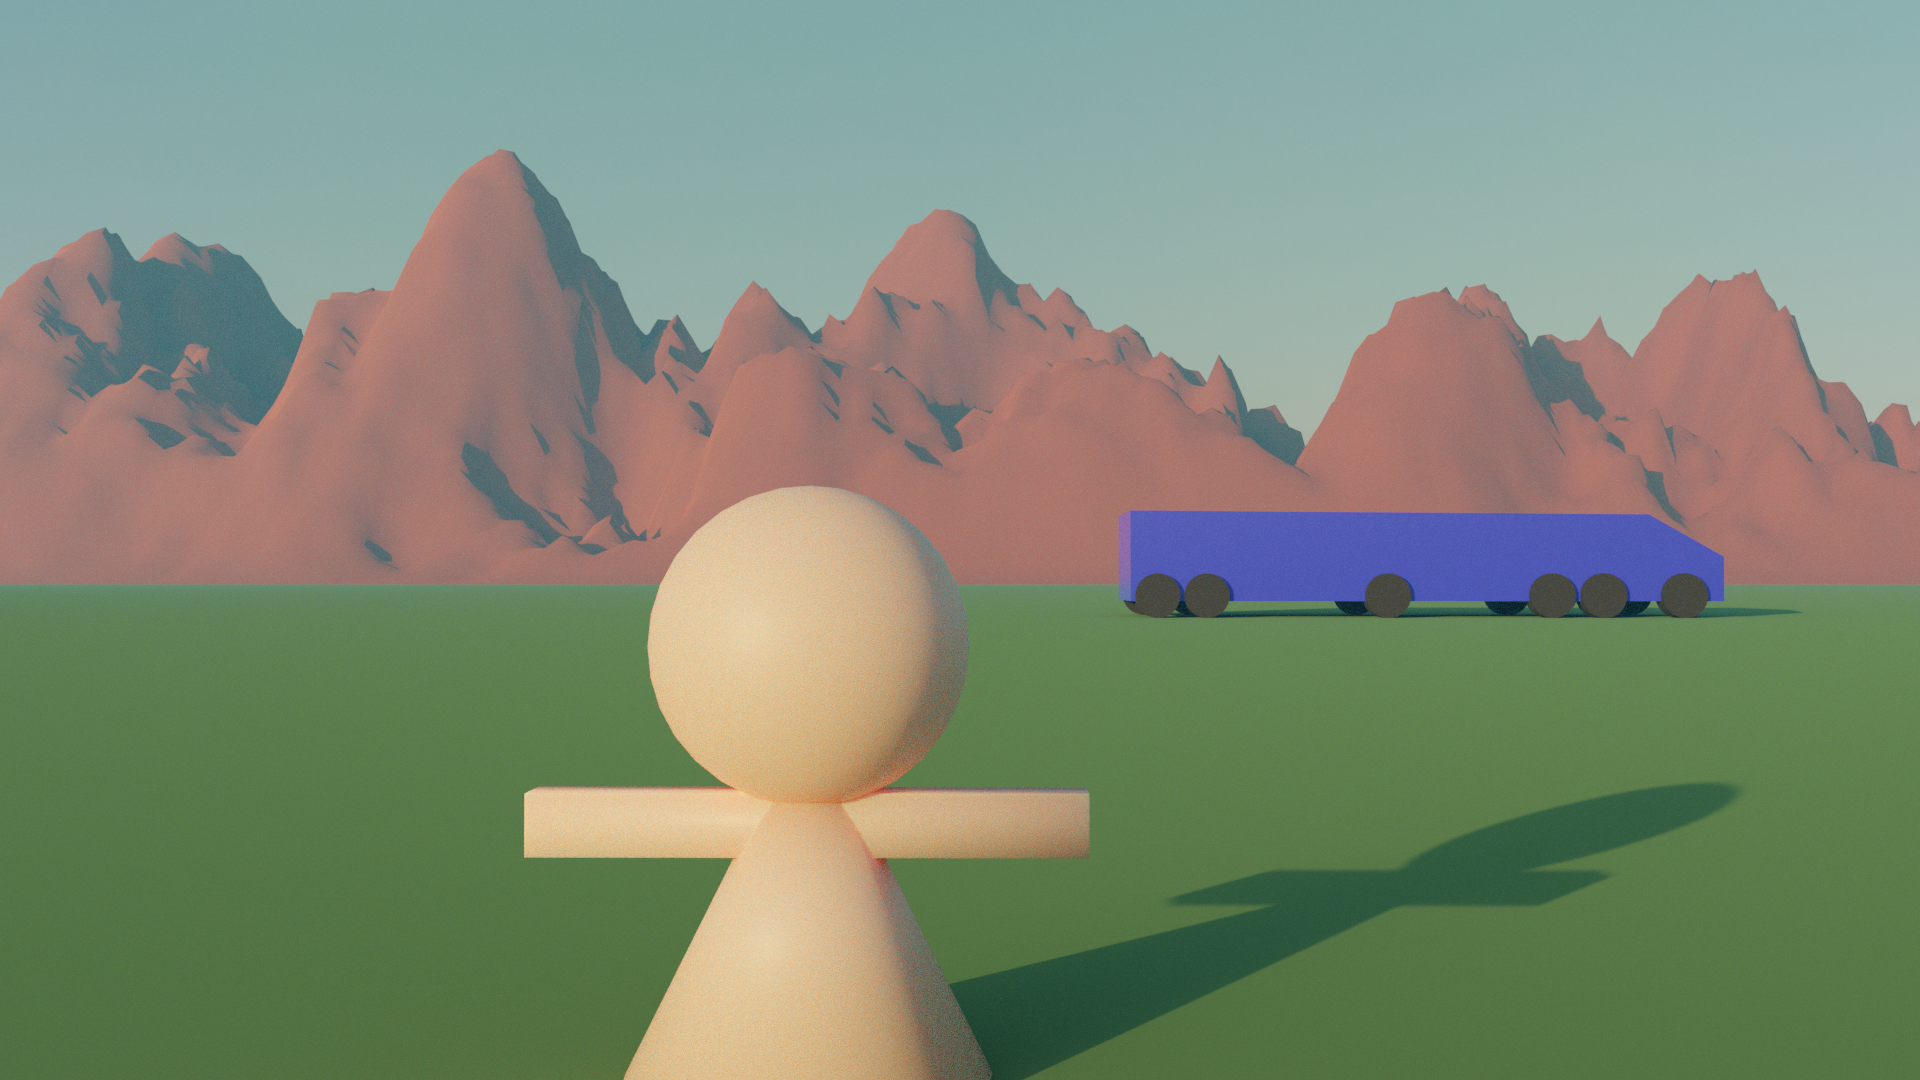
The render time more than doubled, but that’s far less than I expected. However, I am not crazy about the final result. The background looks too washed out, and the sky is also affected by the scattering. Ideally, the scattering should only affect the objects, not the infinite-distance HDRI background.
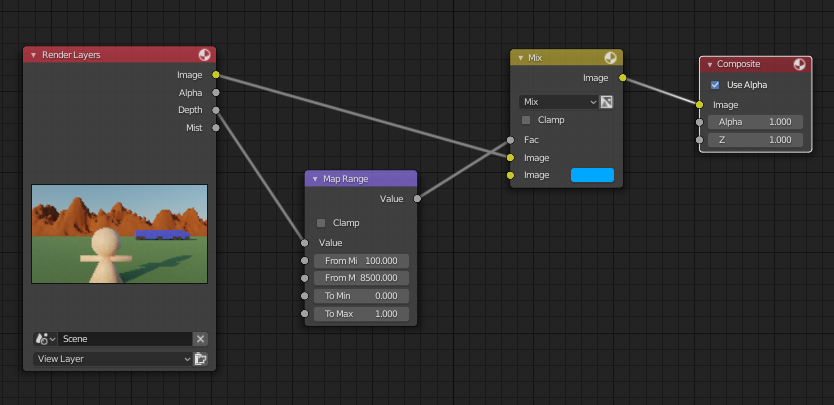
Compositor – Depth Map
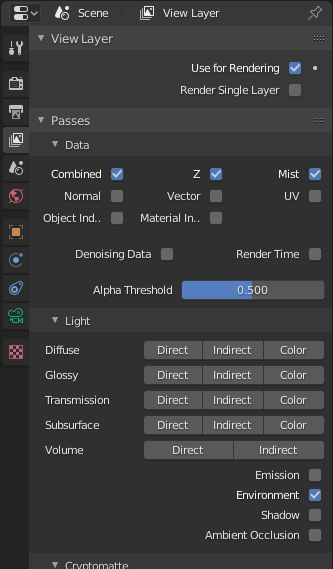
Since atmospheric effects are more pronounced on objects further away from the camera, I decided to try applying them in the compositor using information from a depth map. The Z pass is enabled by default and will provide a Depth output to the Render Layers node in the compositor.
The depth map is not like regular image data; it has floating point data about the distance from the camera to the rendered object for every pixel in the map. So our compositor node network has to convert those distances to values between 0 and 1 before we can use them to effect the image. Here is the final node network, which uses the normalized depth map to mix the rendered image with a sky-blue color.
I like this result a lot better than the Volume Scatter render, and the added compositor step does not increase the render time. But I have a few complaints about this method:
First, the sky is still being affected by the composite. This is due to a limitation in Blender (or a limitation of my skills in Blender). When rendering with a HDRI enviromment in the World settings, the alpha channel of the sky renders at 1 (no transparency), along with the rest of the scene. So you cannot matte out the sky from the rest of the scene.
Second, the depth map is not well anti-aliased, so there is the potential for some artifacts where different depths overlap. I didn’t notice anything obvious in my render, but previewing the depth map definitely had some jagged edges.
Finally, you need to manually tweak the min/max values for every scene, which could be rather tedious. Since different scenes will be at different scales, the Map Range values will probably need to be drastically different for each.
Fortunately, I found a nice Blender feature that fixes some of these problems.
Compositor – Mist Pass
Blender has the ability to render a Mist pass, which is basically a configurable, normalized depth map with some extra controls.
With this solution, I removed all the compositor logic from the previous test and started fresh. Then I enabled the Mist pass in the View Layer properties.
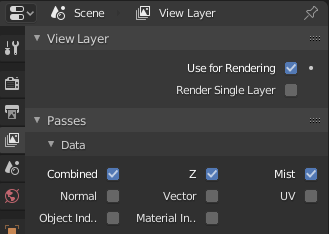
Once that is enabled, you need to configure the mist thresholds in the World settings, under the Mist section.
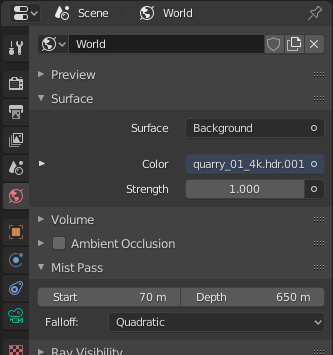
The Start and Depth settings allow you to directly set the thresholds without creating a node in the compositor. The Falloff allows you to control how quickly the mist is applied as objects move further into the distance, giving you greater control over the final result.
Finally, you need to add some nodes to the compositor to apply the mist to the final image. Here I use a Color Ramp to adjust the strength, and that drives a Mix node to fade it into a sky-blue color.
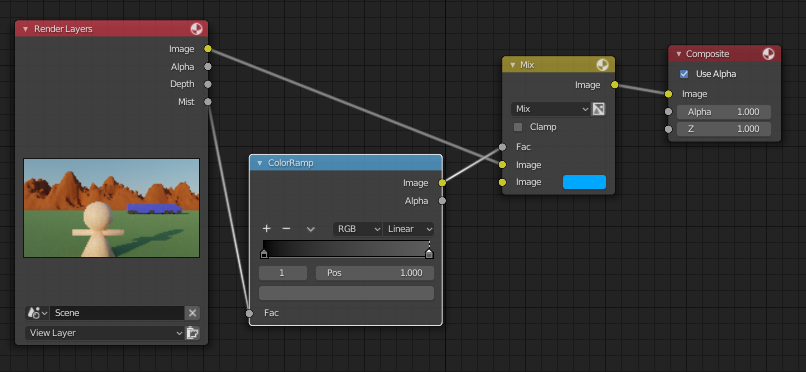

The extra Mist pass only added a few seconds of render time, and the resulting map is nicely antialiased.
My one complaint with this approach is that the sky is still slightly mixed with a solid color. The value of the sky is only 0.82 in the Mist pass, which is surprising since it should be an infinite distance away!
Composite – Mist Pass Alpha Channel
Building on the previous solution, I found a way to correctly render the alpha channel while using HDRI environments and still including the image data in the final render.
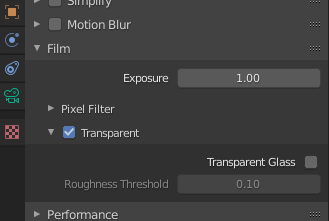
First, you must turn on background transparency in the Render properties.
Next, enable an Environment pass in the View Layer properties.
Last, hook everything up in the compositor’s Node Editor.
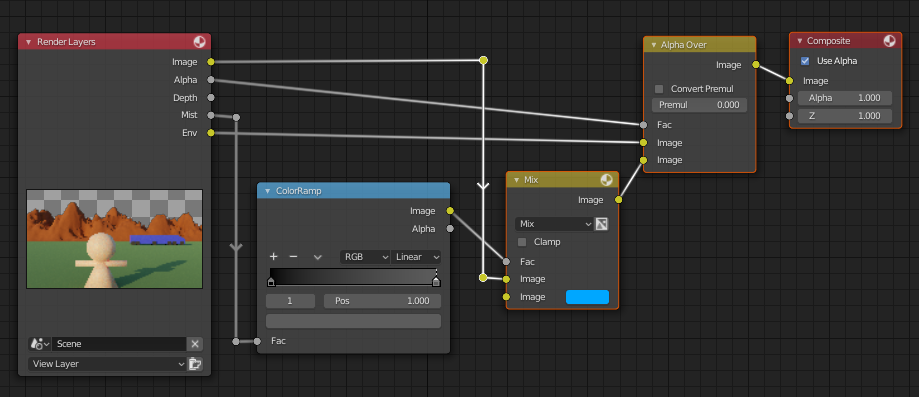
The Env output of the Render Layers node will include the background environment. And the Alpha channel will correctly mask out the background from rendered objects when combined using the Alpha Over node.
And that’s it! The final render combines a Mist pass to fake some atmospheric scattering without touching the sky from the HDRI image.
Conclusion
This ended up being a lot longer than I expected, and I still have a lot more to test out with Blender volumetrics. I will have some follow-up articles where I experiment with some other volumetric features in Blender.
But if you only want to add some atmospheric scattering to your final image, the best way is using the Mist pass, Environment pass, and combining them with the relatively small node network in the Blender compositor.