Creating a marble texture in Maya is as simple as adding a single node. But you can use a more advanced node network to further improve the look of the material. This tutorial will show you how to assign a simple marble texture to an object and then build on that simple texture by adding additional nodes.
Scene
In preparation for this tutorial, I created a very simple scene: a polygon sphere (radius: 1.000), a camera pointed at the sphere (focal length: 55), a key light off to the left of the camera and a fill light (40% intensity) from the right of the camera.
Creating the Basic Marble Texture
First, you need to assign a new material to the object and bring up the node network so we can edit it.
- With the object selected, right-click on the object and select “Assign New Material”.
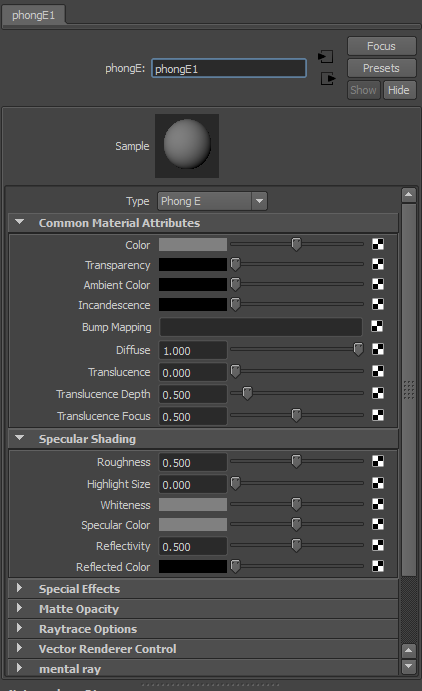
- Select the “PhongE” surface node.
- Open the Hypershade window (Window->Rendering Editors->Hypershade).
- Select the phongE1 material. Right click on the node and choose “Graph Network”.
- In the attribute editor, edit the phongE1 settings so that the Diffuse is turned up to 1.000 and the Highlight Size is set to 0 (specularity is turned off).
Now that the object has its own material assigned, we can very easily give it a marble texture.
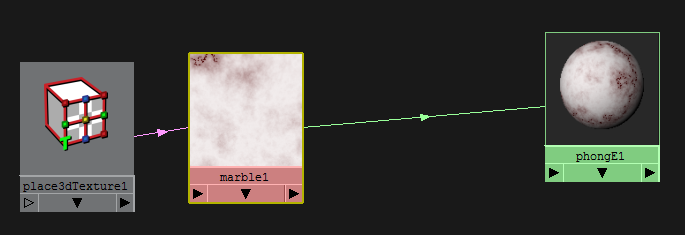
- On the left pane of the Hypershade window, select the “3D Textures” category (under the “Maya” section) and click the “Marble” button to add a new node to the network. (You might need to zoom out the Work Area to see the new nodes.)
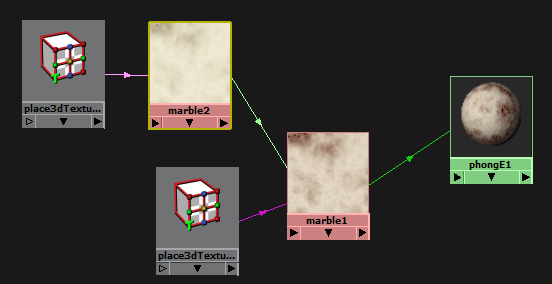
- In the Work Area of the Hypershade, middle-click the marble1 node and drag it to the phongE1 node. Select “color” to connect the output of the marble node to the material.
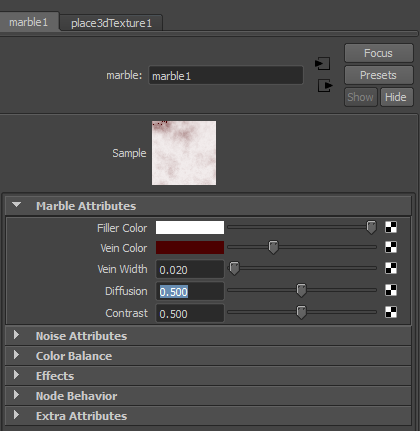
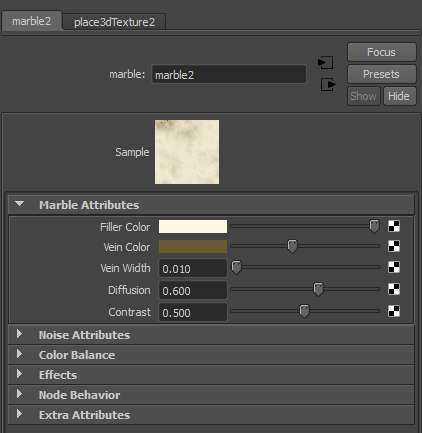
- Edit the marble1 node’s attributes to select the colors, vein thickness, and other parameters that you want for your marble.
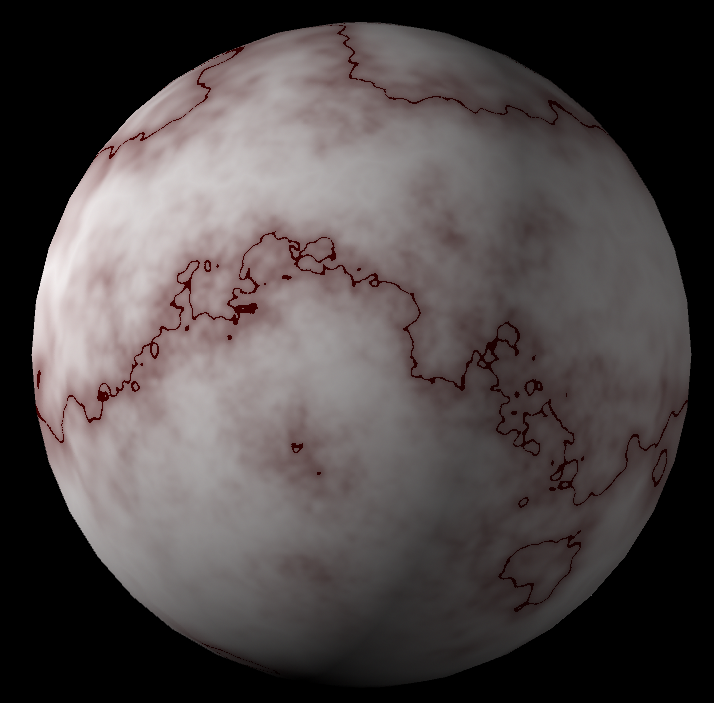
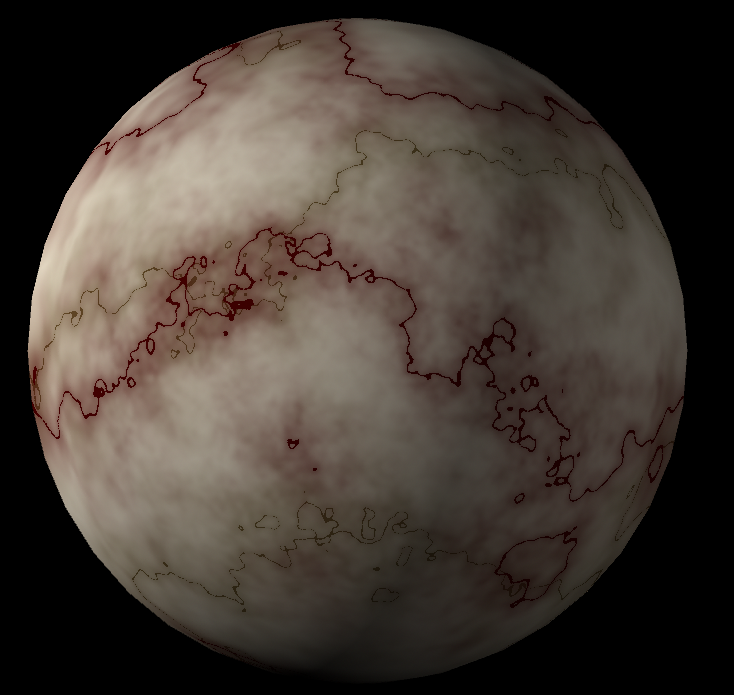
With just this one simple node, you already have a very convincing marble texture applied to the object.
Adding a Second Color
We can improve the look of the marble by adding a second color to the texture.
- In the Hypershade window, add another marble node from the left pane.
- Middle-click and drag the output of marble2 to marble1 and select “Filler color”.
- In the Attribute Editor, change the colors of marble 2. You can also change the vein/diffusion settings, if you want.
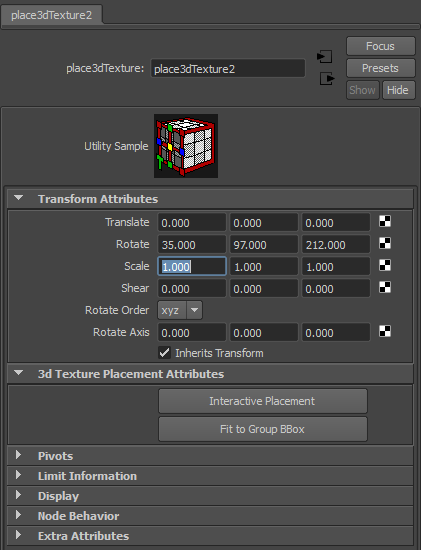
- Select the place3DTexture2 and edit the rotation values in the Attribute Editor. This is necessary so that the second marble texture will not line up with the marble1 veins.
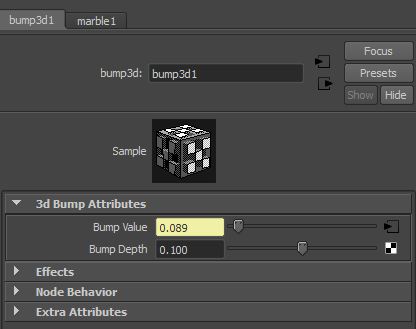
Adding a Bump Channel
Let’s add some roughness to the sphere using a bump map derived from the marble nodes.
- In the Hypershade window, middle-click and drag the marble1 node to phoneE1. Select “Bump Map” to connect the marble1 node to the material’s bump channel.
- Select the new bump3d1 node and edit the attributes in the Attribute Editor. Lower the Bump Depth to 0.100.

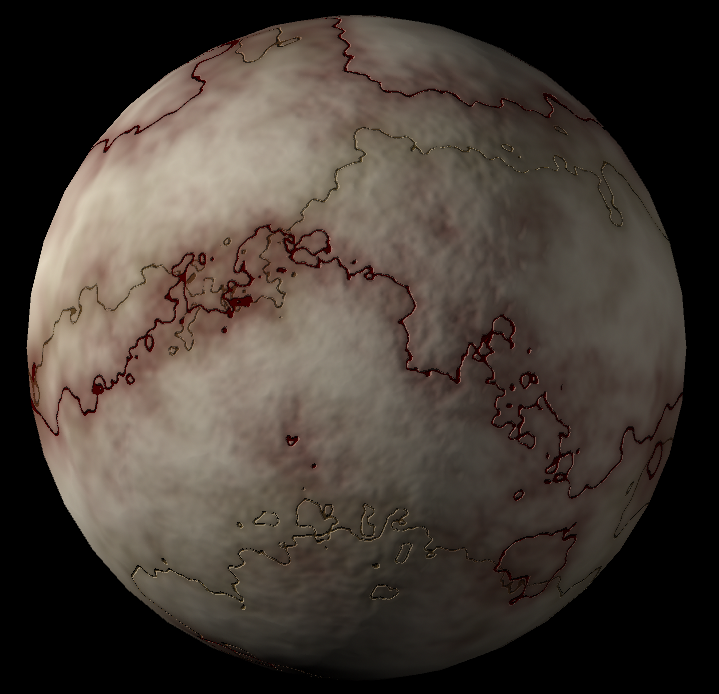
Limiting the Bump Channel
Using the latest node network, bumpiness has been added to the entire sphere based on the marble texture. Let’s modify the bump channel so it only affects the veins from marble1.
- Select the marble1 node in the Hypershade window.
- From the menu, choose Edit->Duplicate->Without Network.
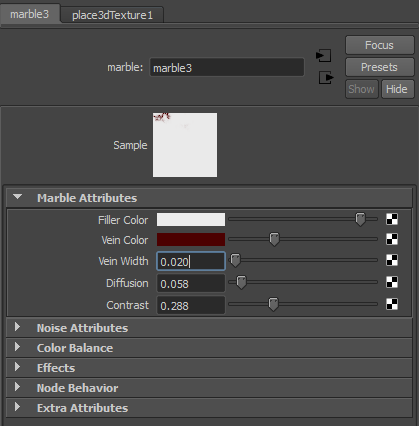
- Select the place3DTexture1 node. Middle-mouse drag it to the new marble3 node and choose “Other”. In the connections panel that appears, choose “worldInverseMatrix” on the left side (outputs) and connect it to “placementMatrix” on the right. Now close the connections panel.
- Select the marble3 node. Edit the settings so that the vein color is more contained to the strong vein areas. You can do this by turning down the diffusion and contract values.
- Middle-mouse drag the marble3 node to bump3D1 and choose “Other”. In the connections panel, connect the outAlpha on the left to bumpValue on the right.
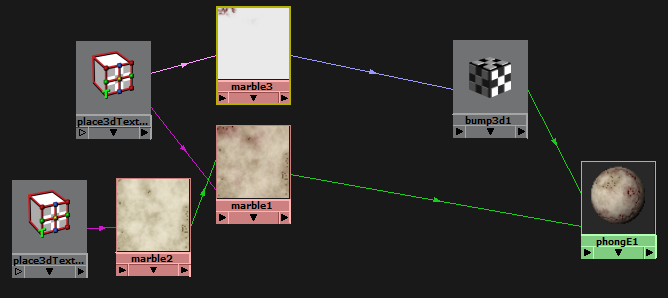
Now, because marble1 and marble3 have the same noise settings and share a placement node, the veins and diffusion patterns are in identical spots. Marble3 has been modified to eliminate most of the diffused vein color, so the bump should only affect the strong veins running through the marble. Try a render and take a look!
Final Thoughts
The material can be further improved by enabling reflections on the material or faking them with specularity settings. You can also use sub-surface scattering to add additional realism, especially if the object is a sculpture or other object that varies in thickness. But using this tutorial will give you an excellent head start on creating a convincing, realistic marble material to use in your scenes. Good luck!