Remember when I 3D printed the pistol from Firefly? I finally revisited that project and finished the 3D printed pieces, turning the plastic-looking parts into a fully assembled, realistic looking replica of Malcolm Reynold’s pistol!
Watch the video to learn how I transformed 3D printed parts into my first replica prop gun!
Sanding
I spent a lot of time on this project sanding the 3D parts smooth. I found the best way was to start with 80 grit sandpaper to get rid of all the print lines. Then I moved up to 180 grit to refine the finish. And finally, I moved to 240 grit or even 400 grit to really smooth out the surface.
Priming
Once a part was sanded smooth, I used automotive filler primer to prepare the part for painting. The filler primer helps to smooth over minor imperfections that I missed during sanding. After priming, I checked the piece for any imperfections I might have missed. If I find any, I go back to sanding and then re-prime.
Assembly
I used CA glue to permanently assemble the different pieces together. After gluing the main sides of the pistol to the center piece, I used Bondo Glazing and Spot Putty to hide the seams. It took me several iterations of applying the spot putty, letting it dry, and then sanding it smooth before I was happy with the result. Then I primed the area one more time before painting the pistol.
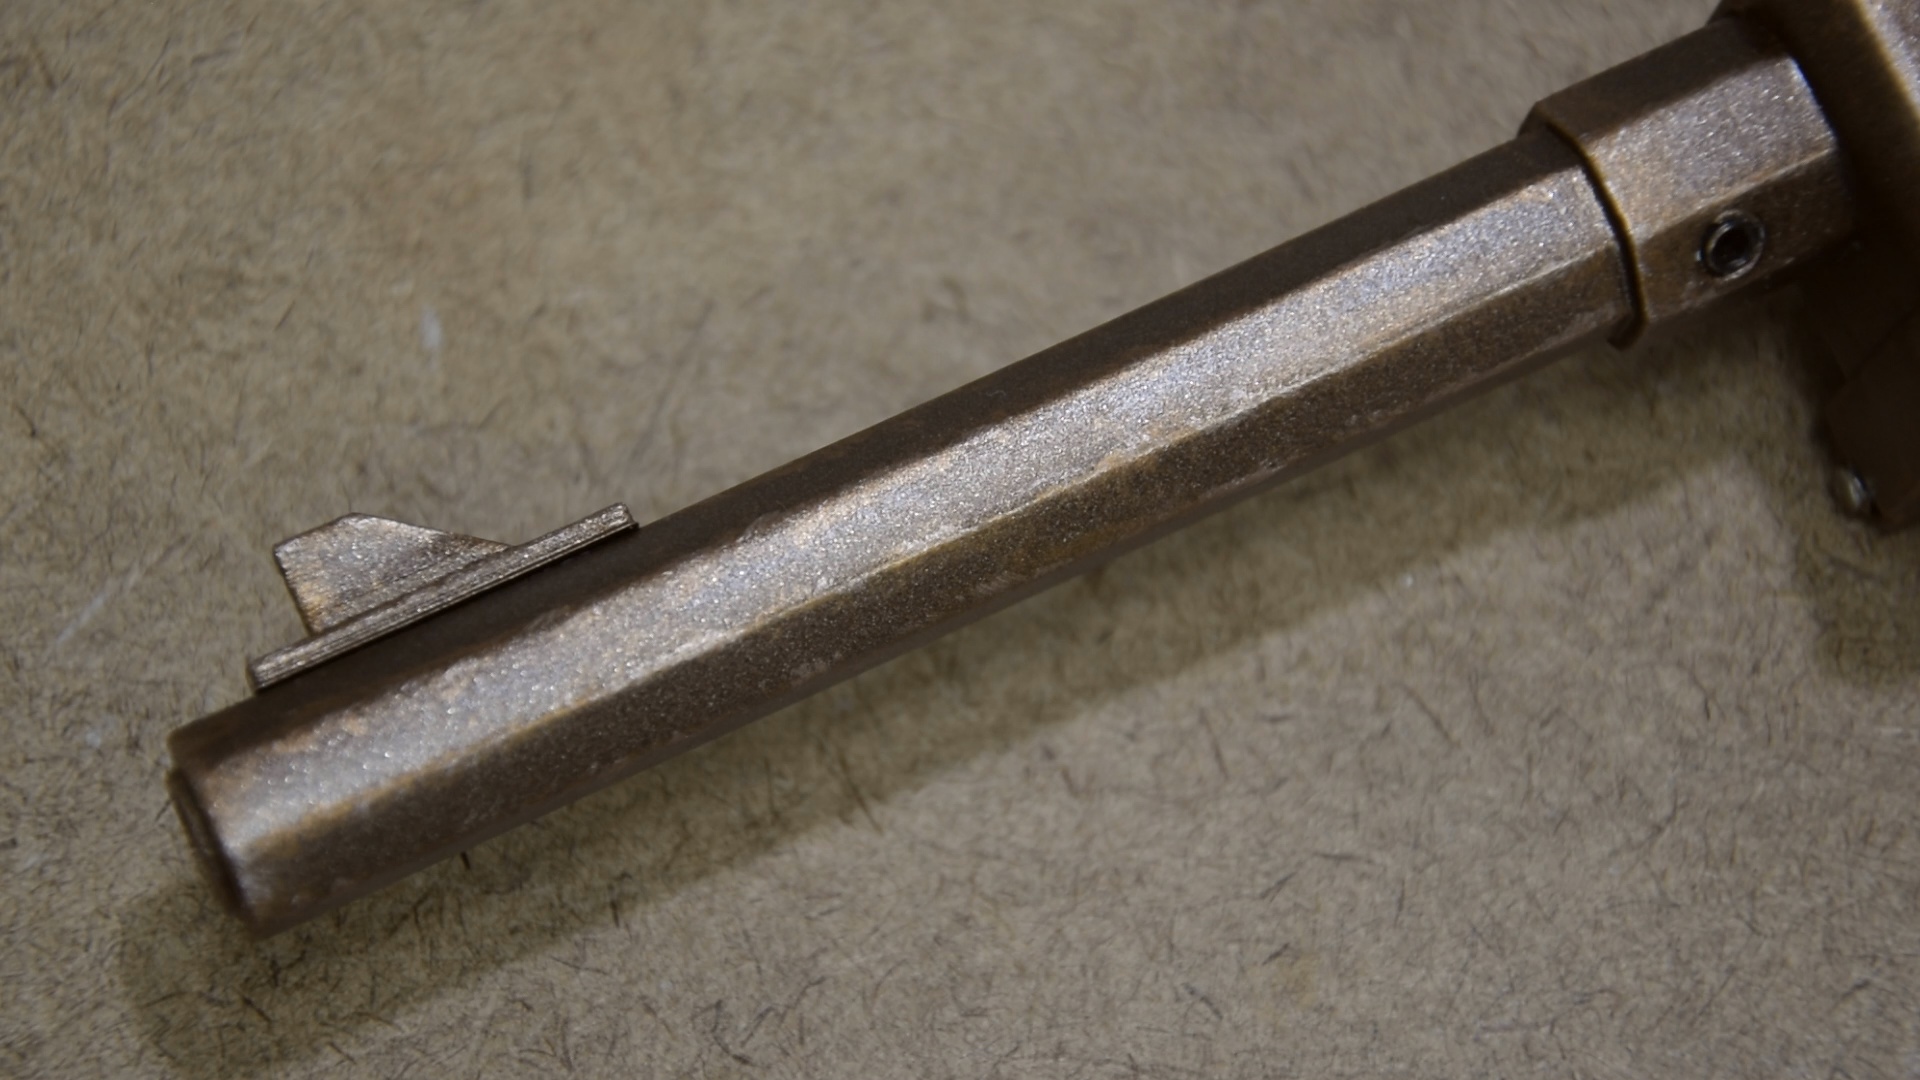
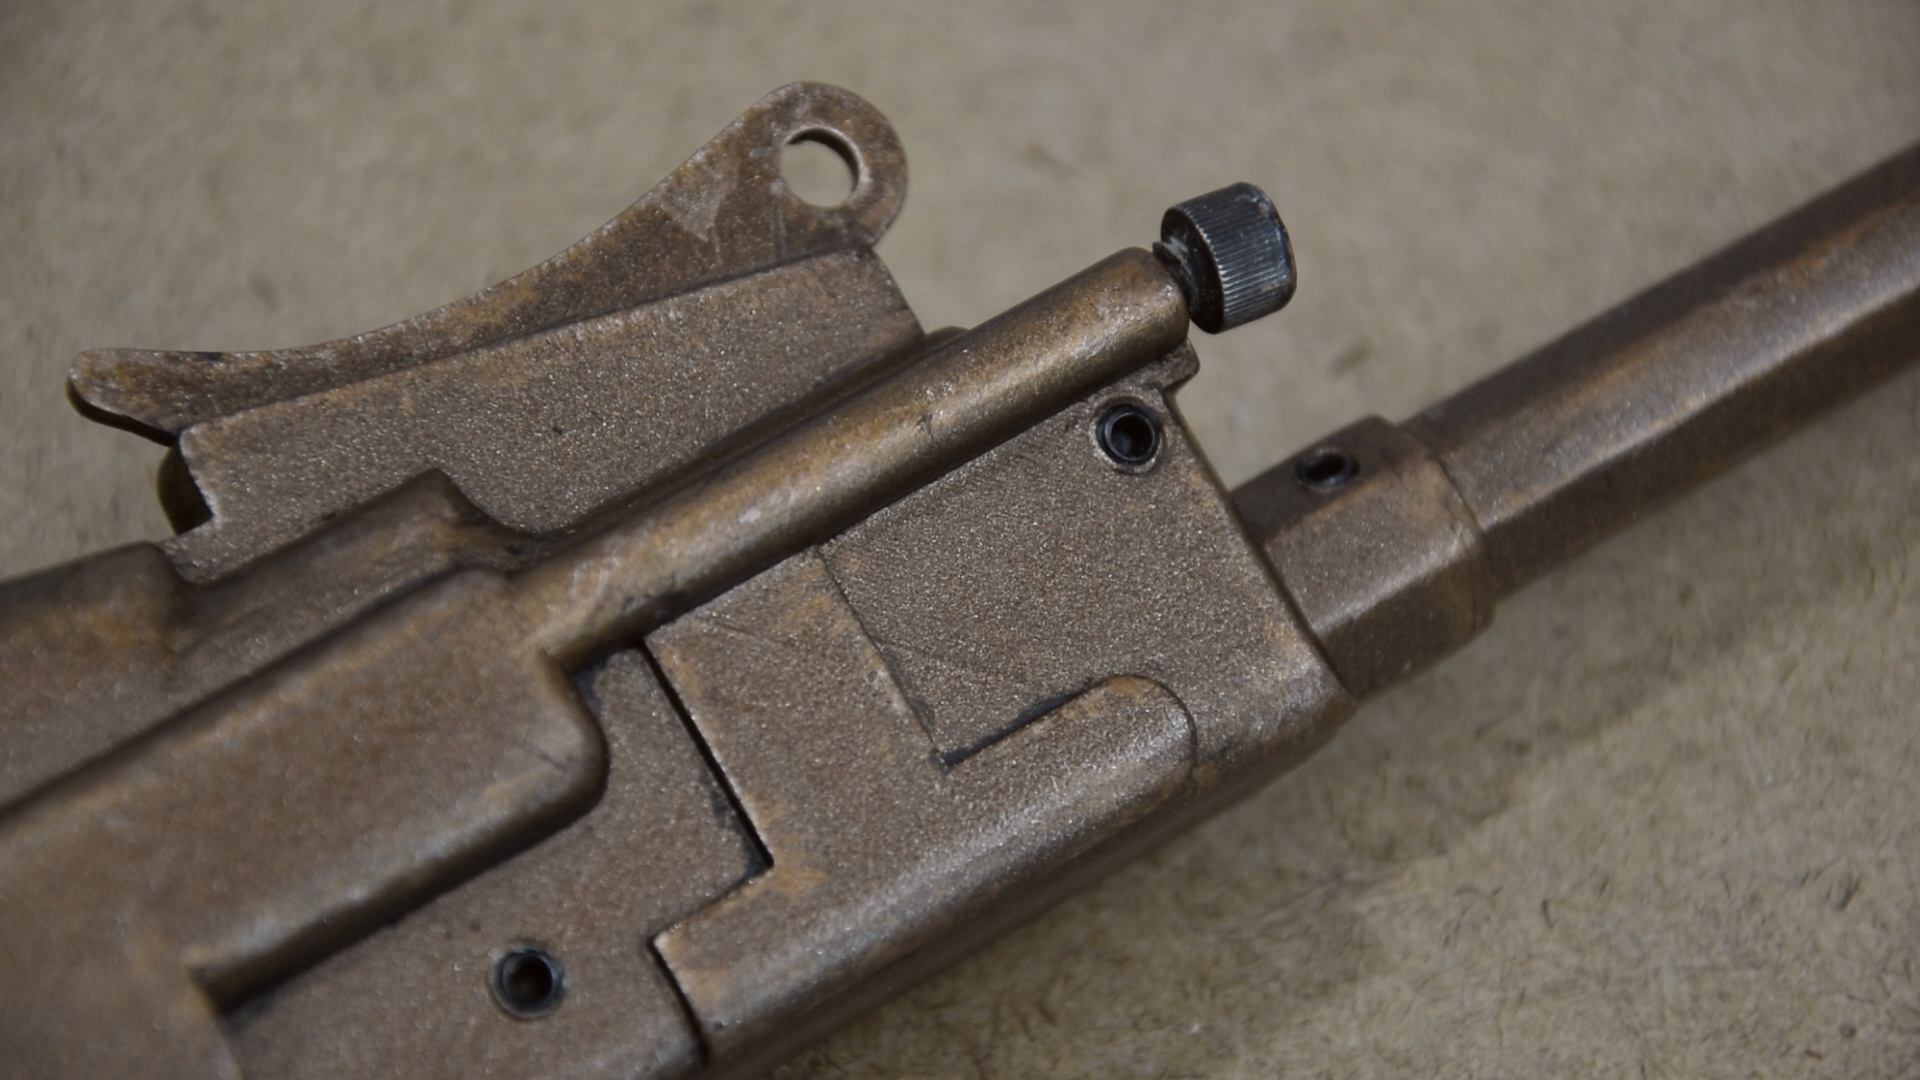
Painting – Metal
For the metal pieces, I started with a base coat of Dark Copper Metallic spray paint. After I glued on the smaller pieces, like the sight on the barrel, I began weathering the pistol.
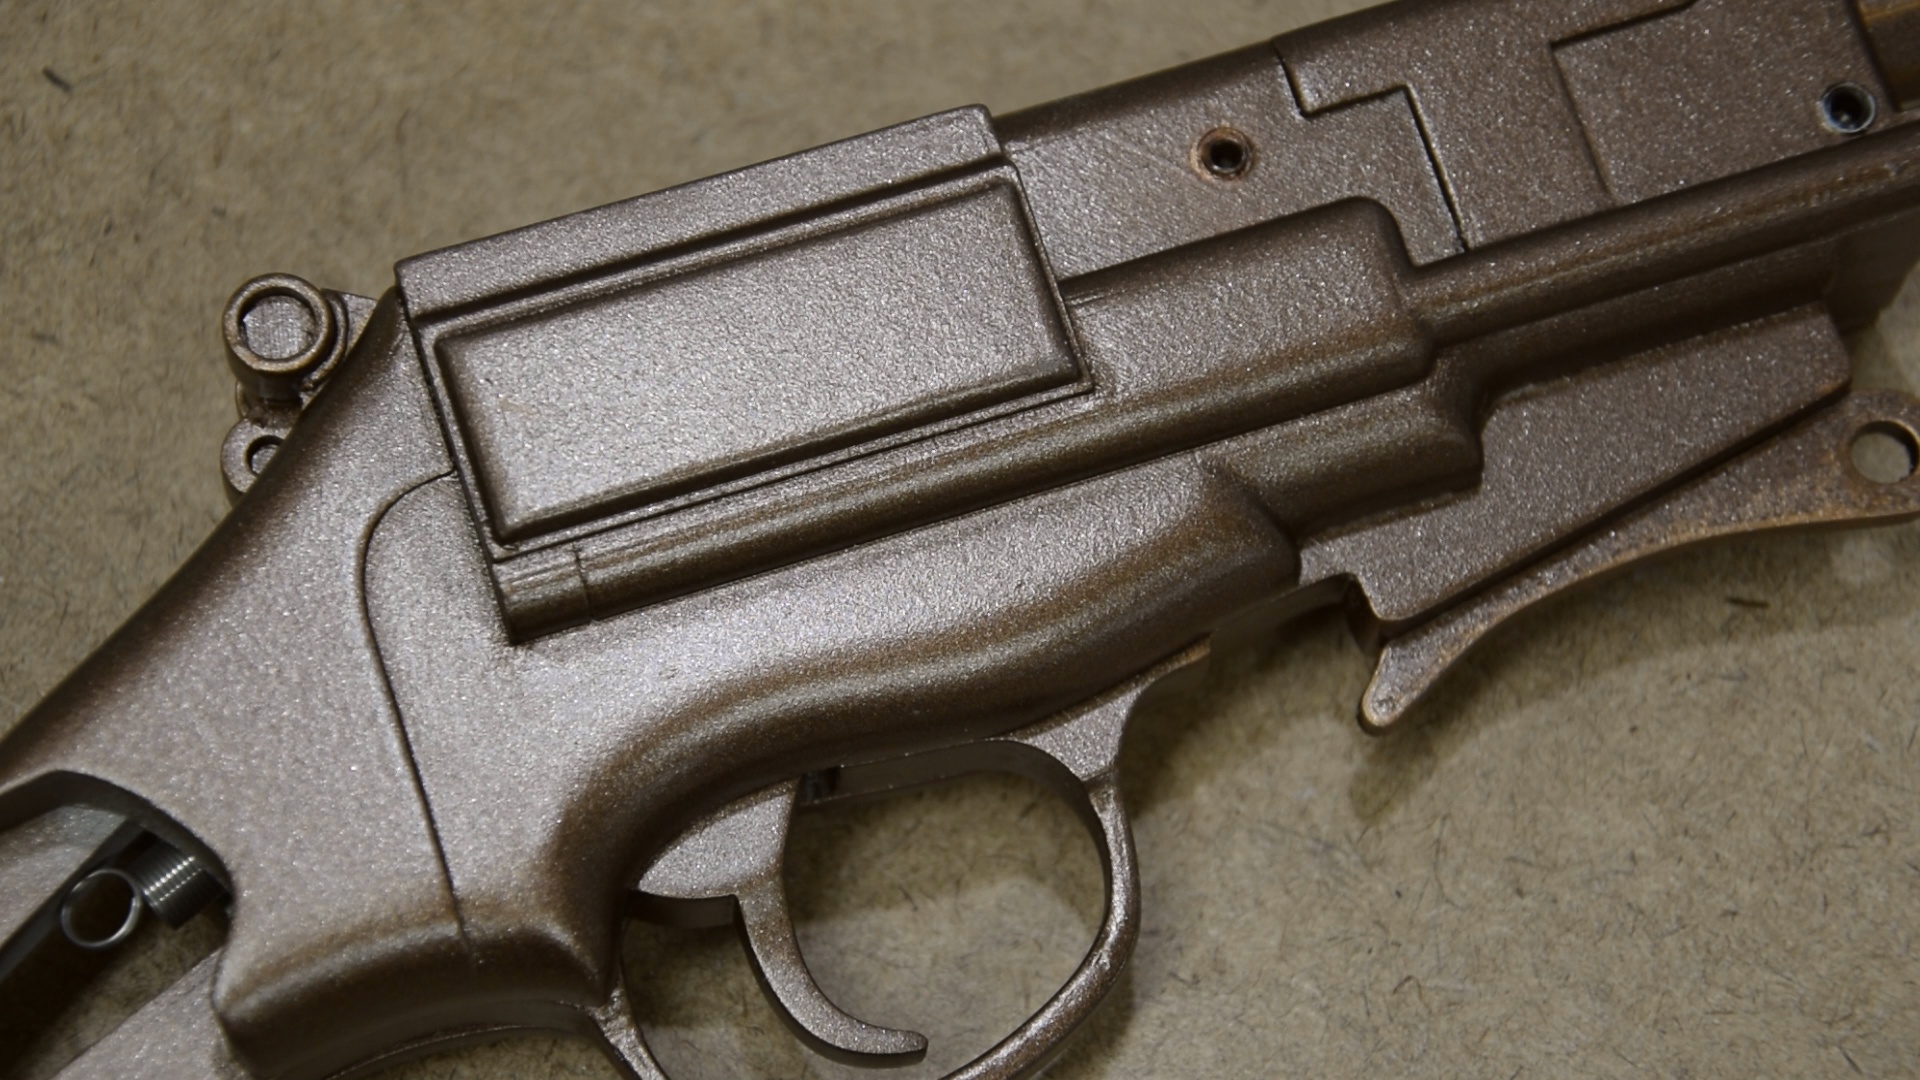
To add some weathering and depth to the paint job, I used Liquitex Professional Heavy Body Iridescent Rich Bronze acrylic paint on the sharp corners and rounded edges of the pistol. Using a dry-brush technique, I tried to make the sharp corners look scratched and weathered, and the rounded edges more polished and burnished. The Rich Bronze color was slightly brighter than the base paint, so it gave a nice, subtle effect.
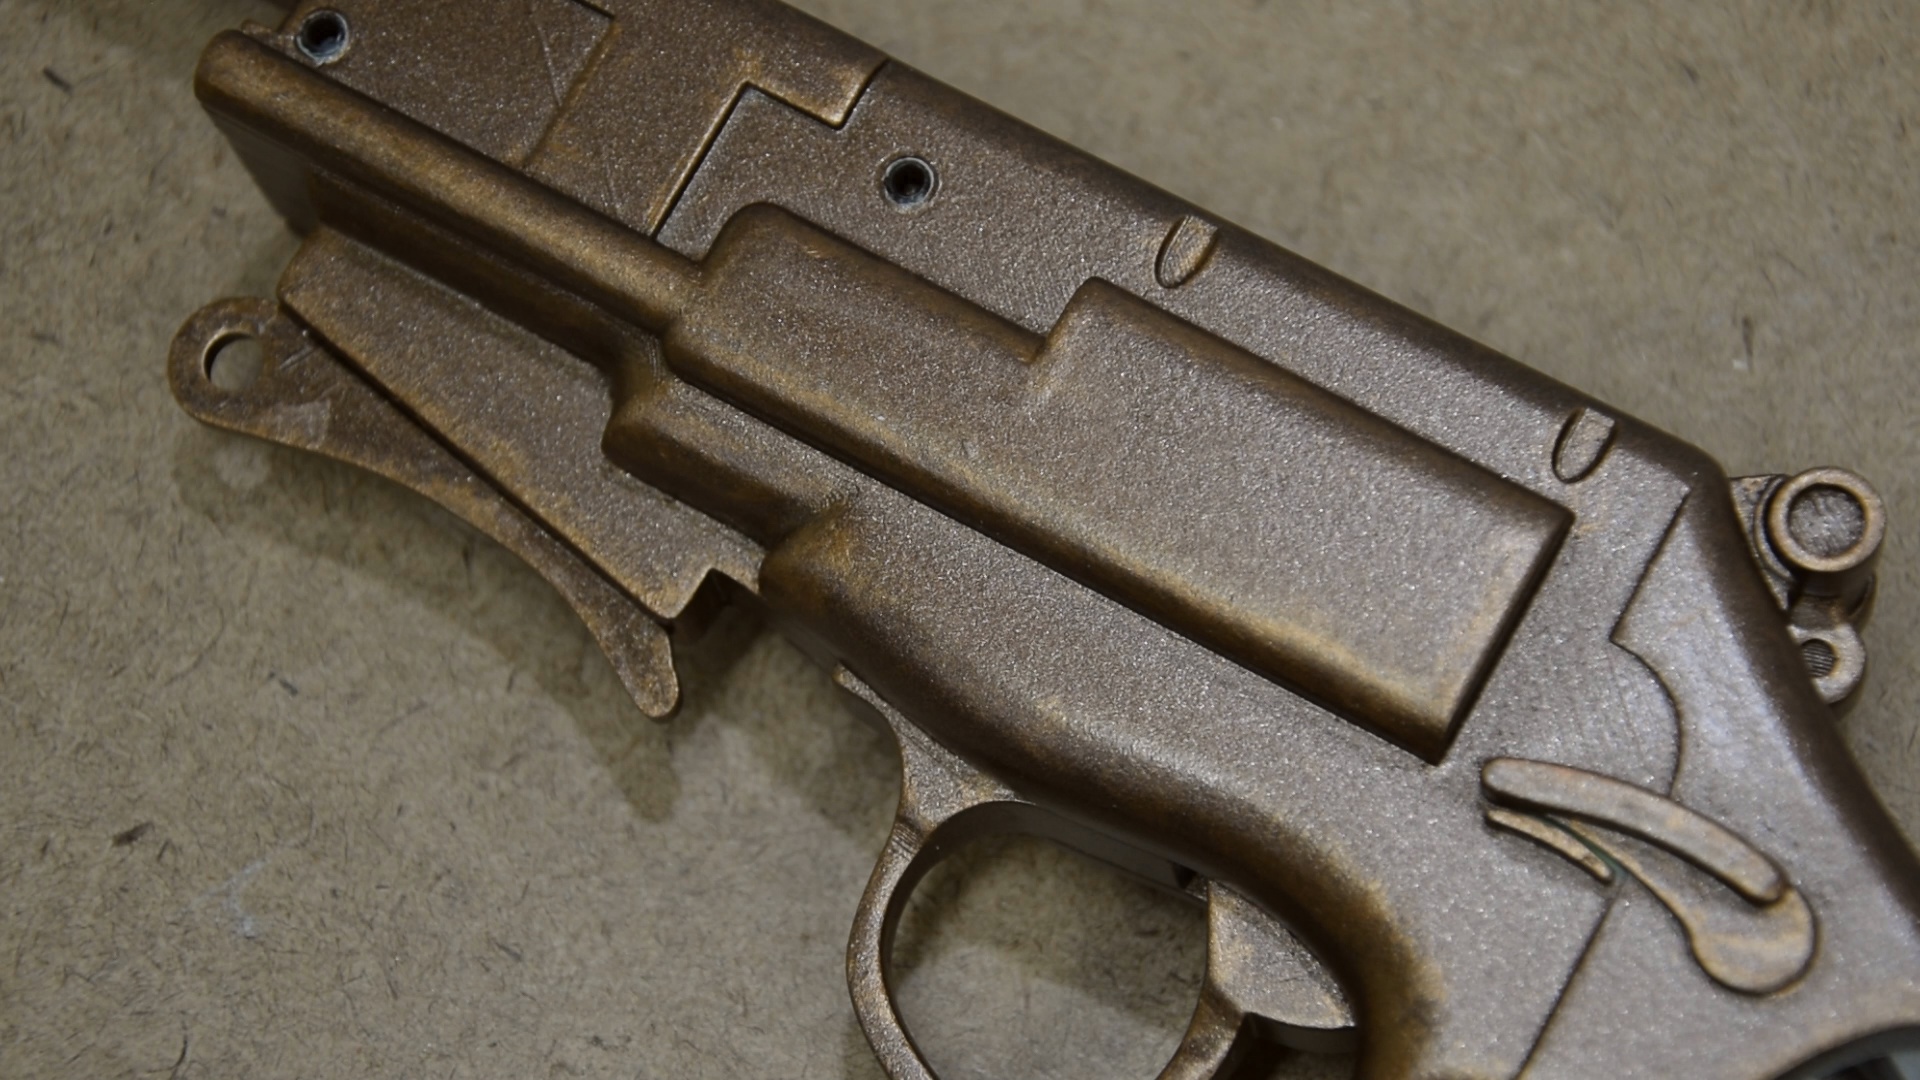
Then I mixed the bronze paint with some Iridescent Silver acrylic paint for a brighter color and applied it to the same places, except using even less paint than before. This coat helps add a little more contrast on those edges and give the illusion of metallic scratches on the surface.
Painting – Wood Grips
After sanding the grips smooth, I used 80 grit sandpaper to gouge fake wood grain into the plastic. By moving the sandpaper only in one direction, the grips had shallow channels that will be able to hold darker paint later. I added deeper grooves using a needle file where the wood grain will be more pronounced.
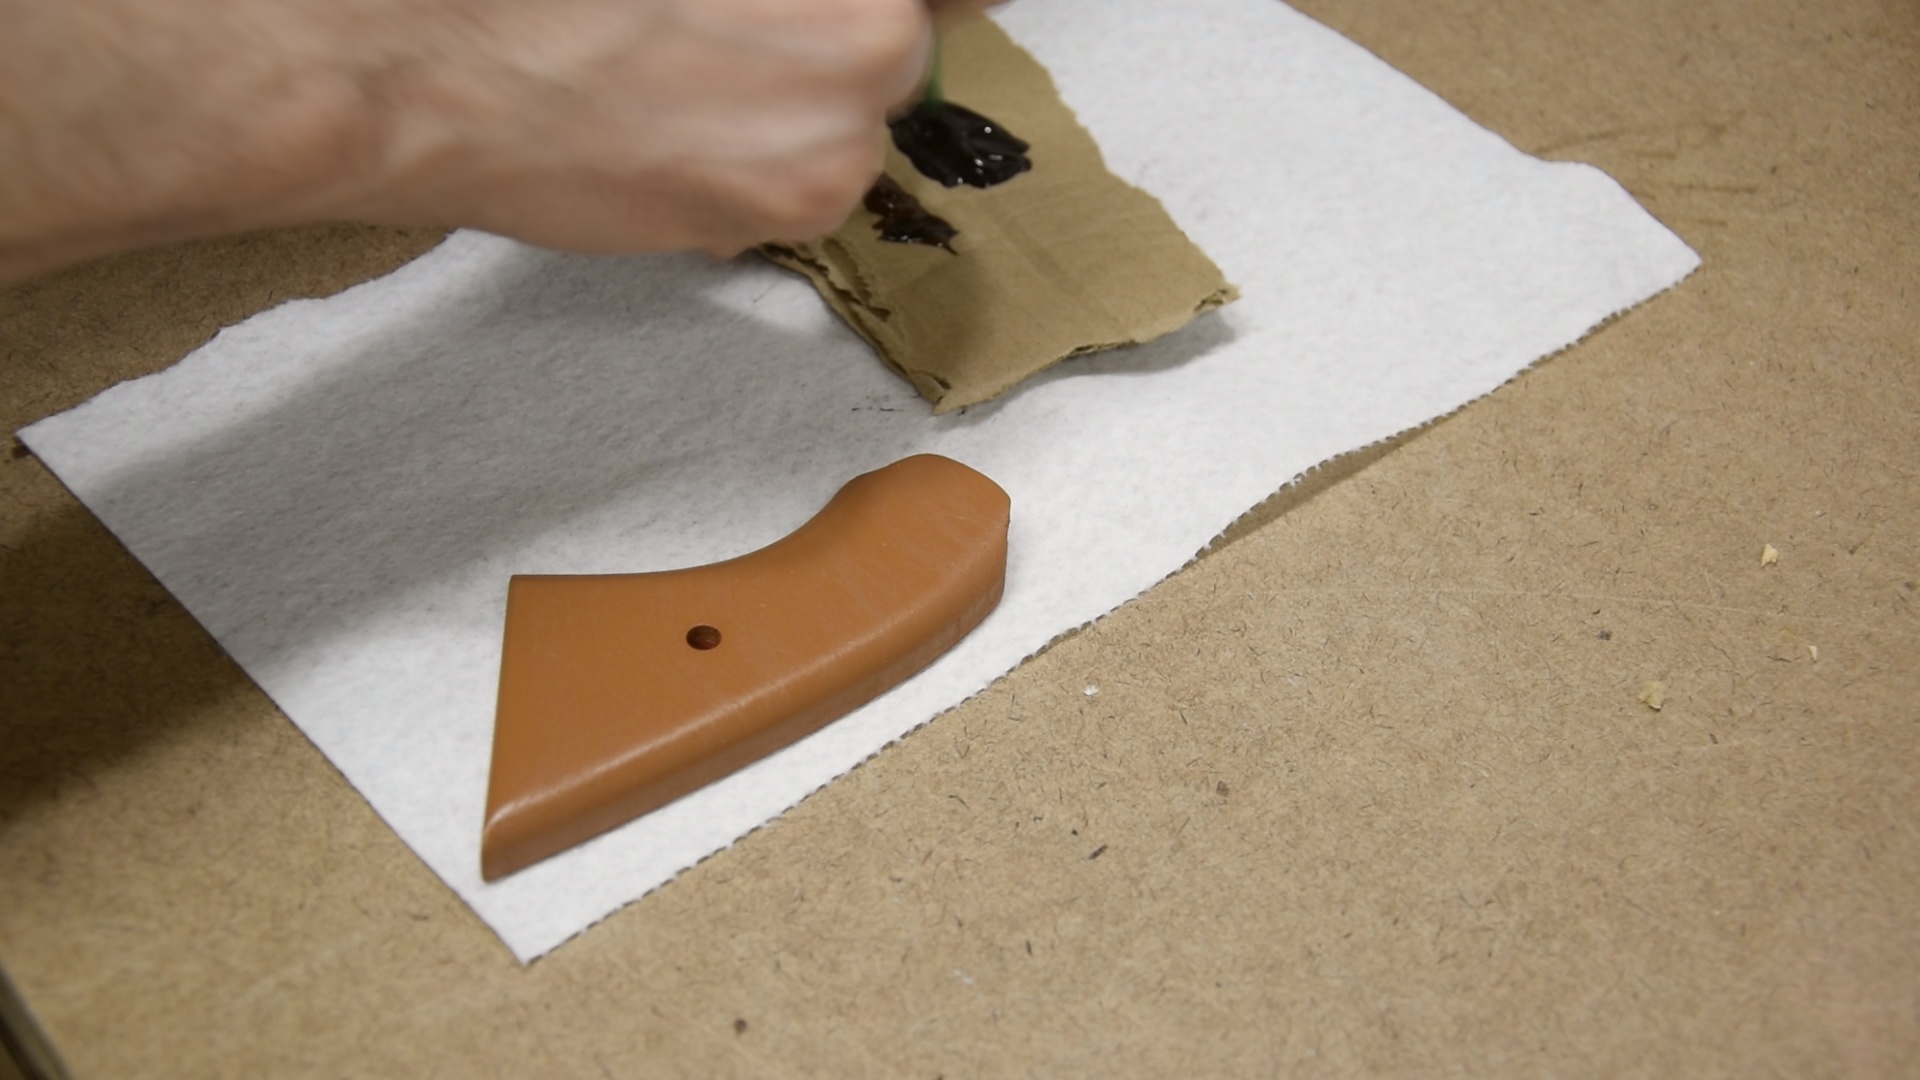
I painted the wood grips using a Warm Caramel colored spray paint for the base coat, which is a light brown color. Then I mixed black and brown acrylic paints for a dark-brown wood grain color, which I applied in multiple coats, trying to get it into the grooves earlier and add some darker bands to the grips.
For the last coat, I used a lighter brown acrylic paint to paint some lighter streaks onto the grips, to add more color variety.
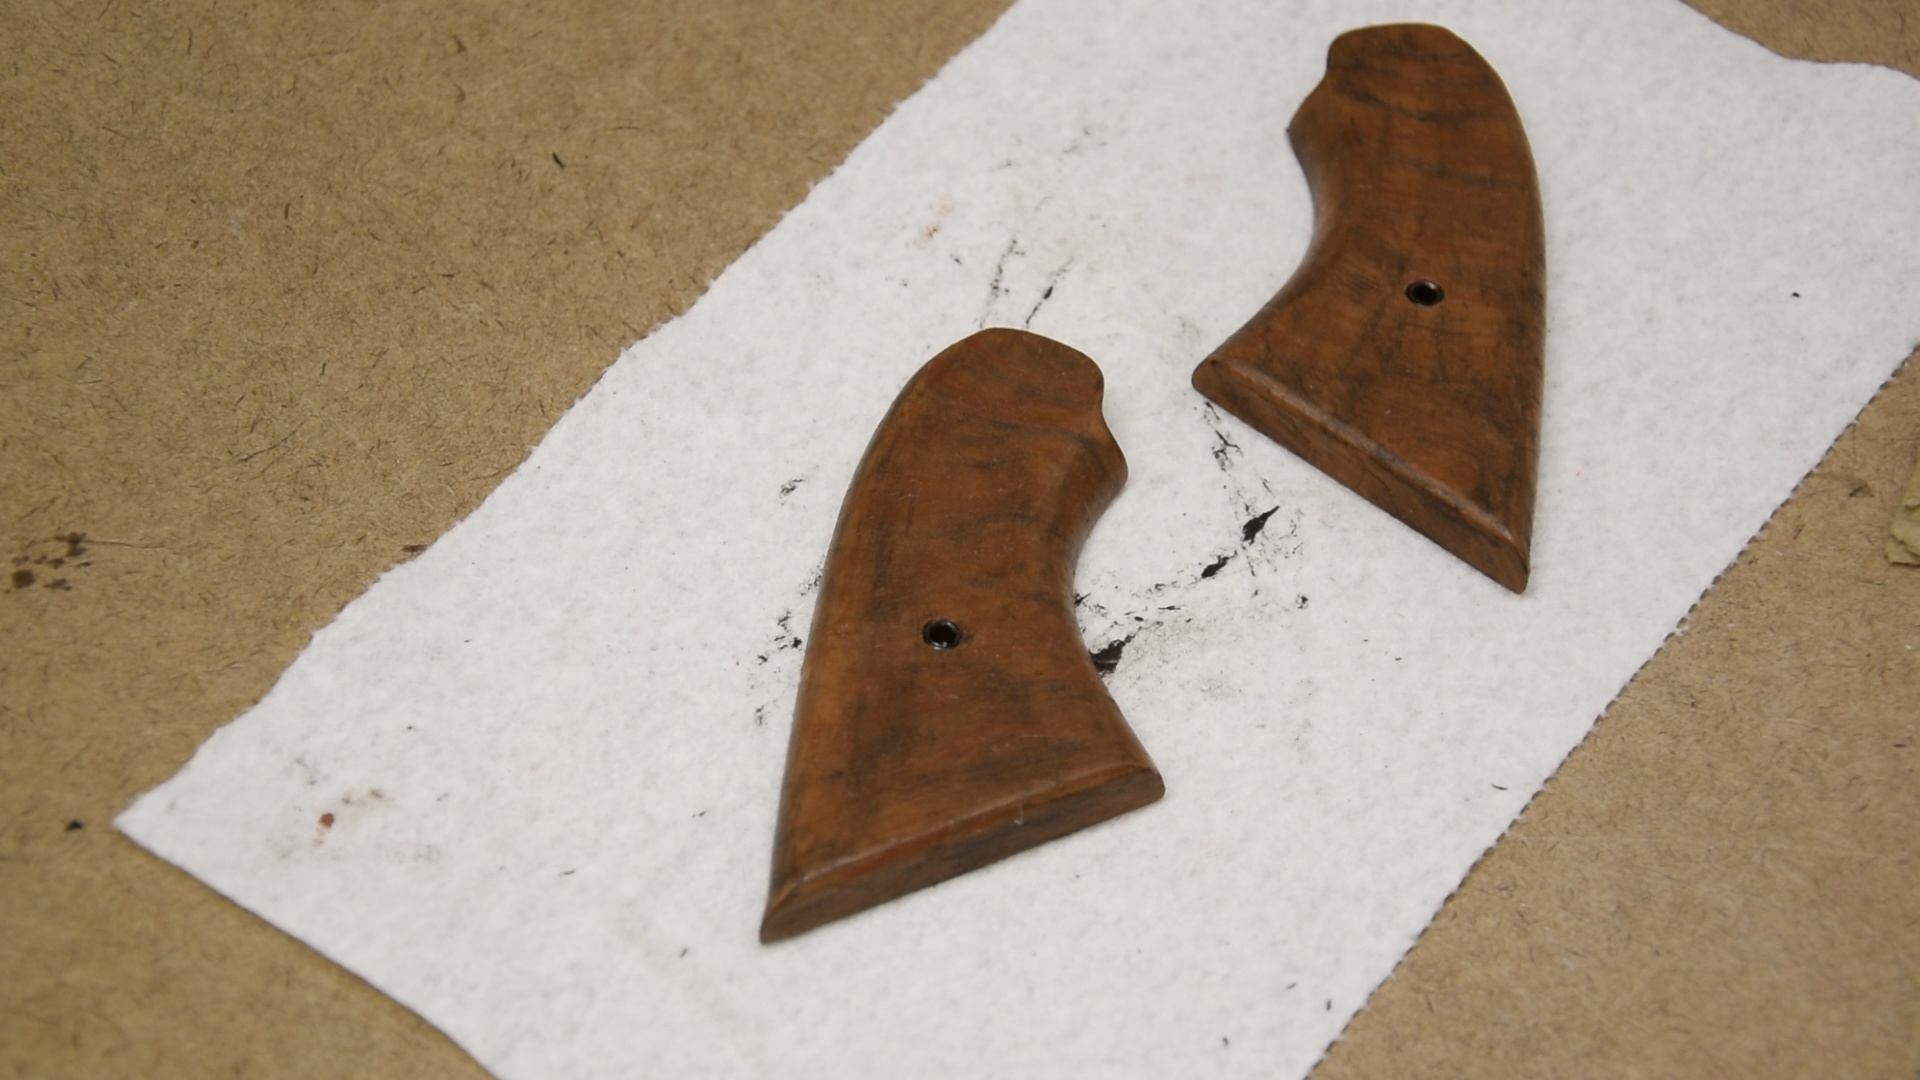
Once I finished painting the grips, I glued them to the pistol.
Blackwash – Adding Dirt and Grime
For one last weathering step, I mixed black and brown acrylic paints again to get a dark muddy color. Then I painted all of the inside corners and crevasses of the pistol, including where the grips meet the metal. Before the paint could dry, I wiped off as much as I could using a paper towel, leaving behind a small amount of paint to add contrast to the corners and simulate a little dirtiness to the gun.
The pistol should be pretty clean and well maintained, so I tried to make this a subtle effect, rather than letting the dark paint dry all over the gun.
Finished!
After all that work, my first replica prop is finished!
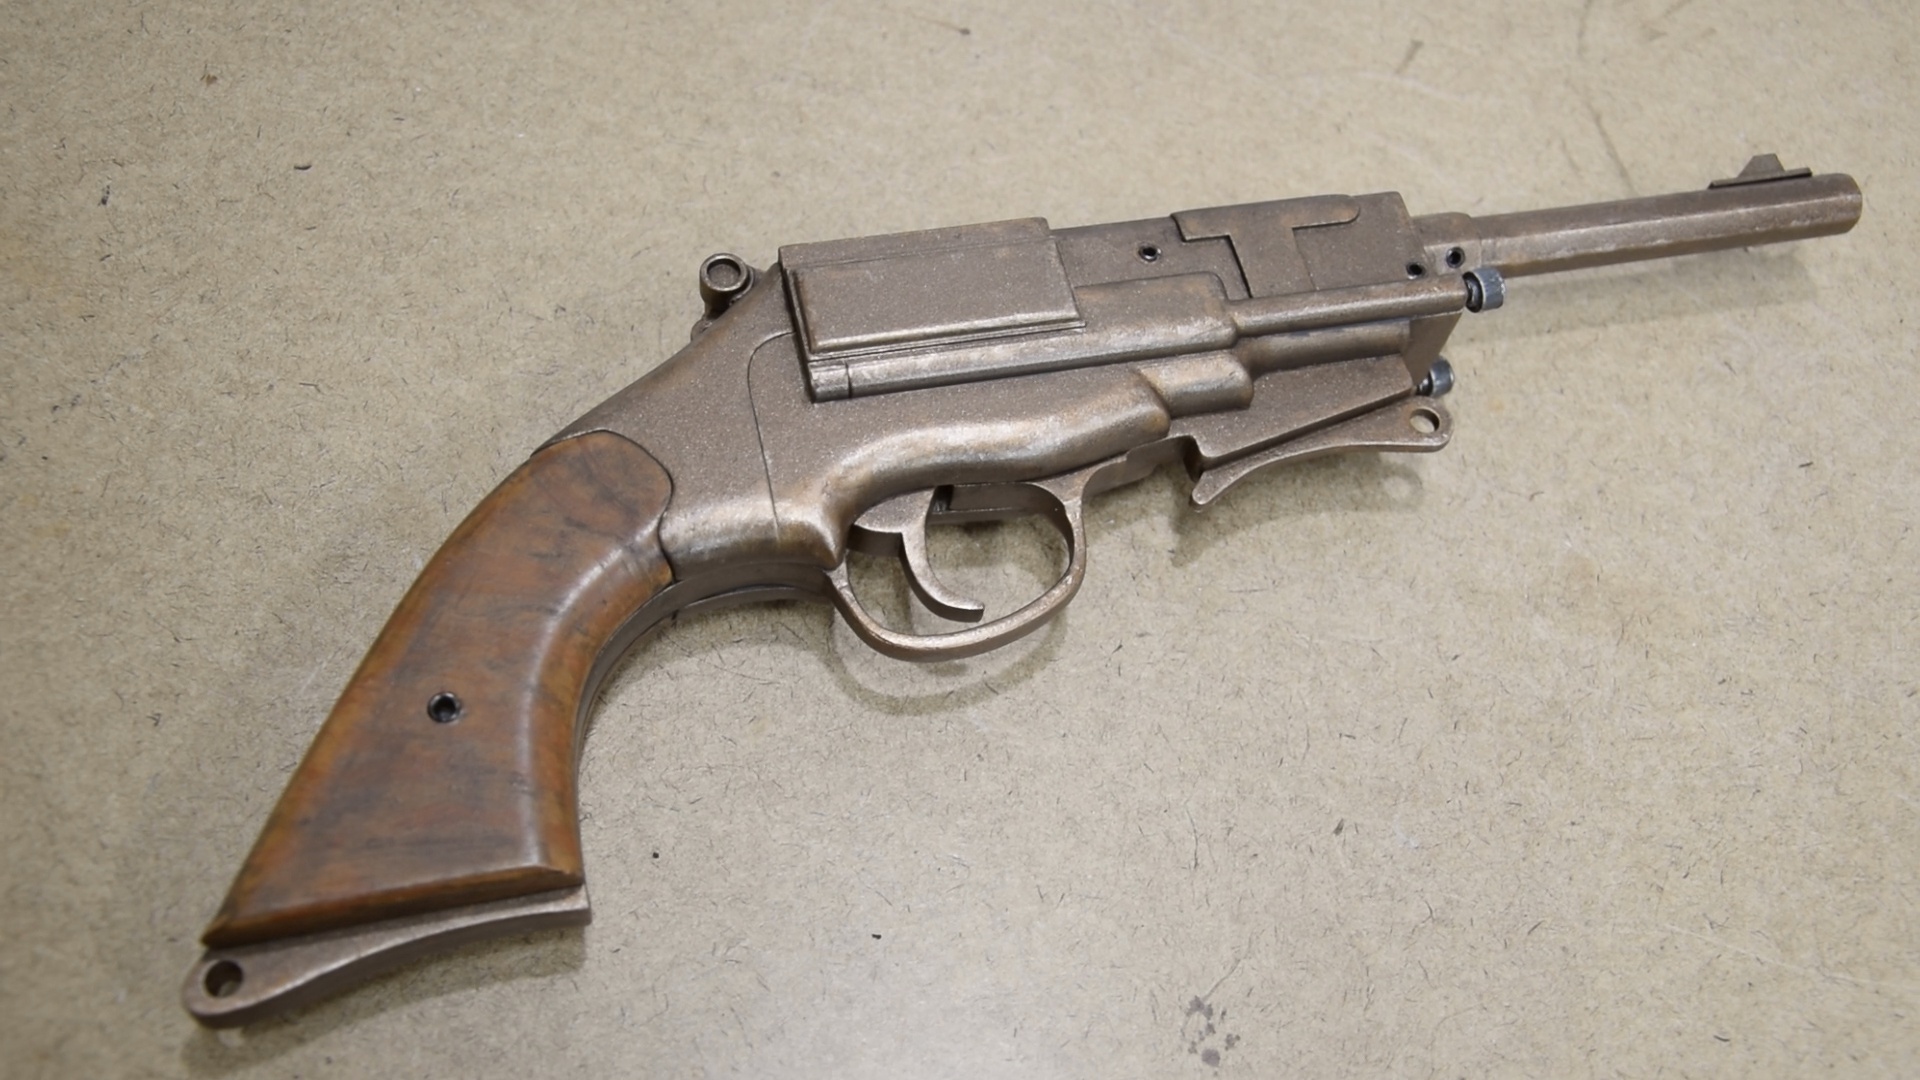
I’m really happy with the result!
Links
- Learn how I designed the 3D models using Fusion 360 using the free templates from Punished Props
- Download the updated STL files to print your own copy of the Moses Brothers Self-Defense Engine.
- Dupli-Color Automotive Filler Primer
- Rust-Oleum Metallic Spray Paint, Dark Copper Metallic
- Rust-Oleum Painter’s Touch Warm Caramel Satin
- Liquitex Professional Heavy Body Iridescent Bright Silver
- Liquitex Professional Heavy Body Iridescent Rich Bronze
- Liquitex Basics Acrylic Ivory Black
- Liquitex Basics Acrylic Burnt Umber
- Liquitex Basics Acrylic Burnt Sienna
- Bondo Glazing and Spot Putty
- Punished Props YouTube Channel, a great YouTube channel for learning how to make your own props and replicas!