I decided to try something completely new recently: I created a YouTube channel! So far, I have a few videos showing my new foray into the maker movement. My latest video, which was just released, gives tips for anyone new to 3D printing or with a new Prusa i3 MK2.
I recently received my new Prusa 3D printer, which is the first 3D printer I have ever owned! With my history with 3D modeling, animation, and electronics, I thought this was a great next step. And it has been a lot of fun!
But the first few days with my new 3D printer were a bit troublesome, because I ran into some basic problems that were caused by a lack of knowledge. So I wanted to share some of what I learned, in the hopes that it saves other people time and frustration with their 3D printers.
Tip 1 – Get calipers
Calipers are an essential tool for 3D printing. Using your calipers, you can measure and verify the size of your prints. And anytime you design a new piece that needs to fit into an existing space, your calipers give you precise measurements for your design. 3D printers work with tolerances measured in fractions of a millimeter (the Prusa can print at .05mm precision), so you often need the precision that a good set of calipers can give.
Fortunately, you don’t normally need a very expensive set. You can get away with an inexpensive set from Amazon, which currently costs $11 at full price. I bought a slightly nicer set and it only cost about $25.
If you don’t already have a set of calipers, buy them immediately. Just consider it part of the cost of owning your 3D printer.
Tip 2 – Set your first layer height correctly
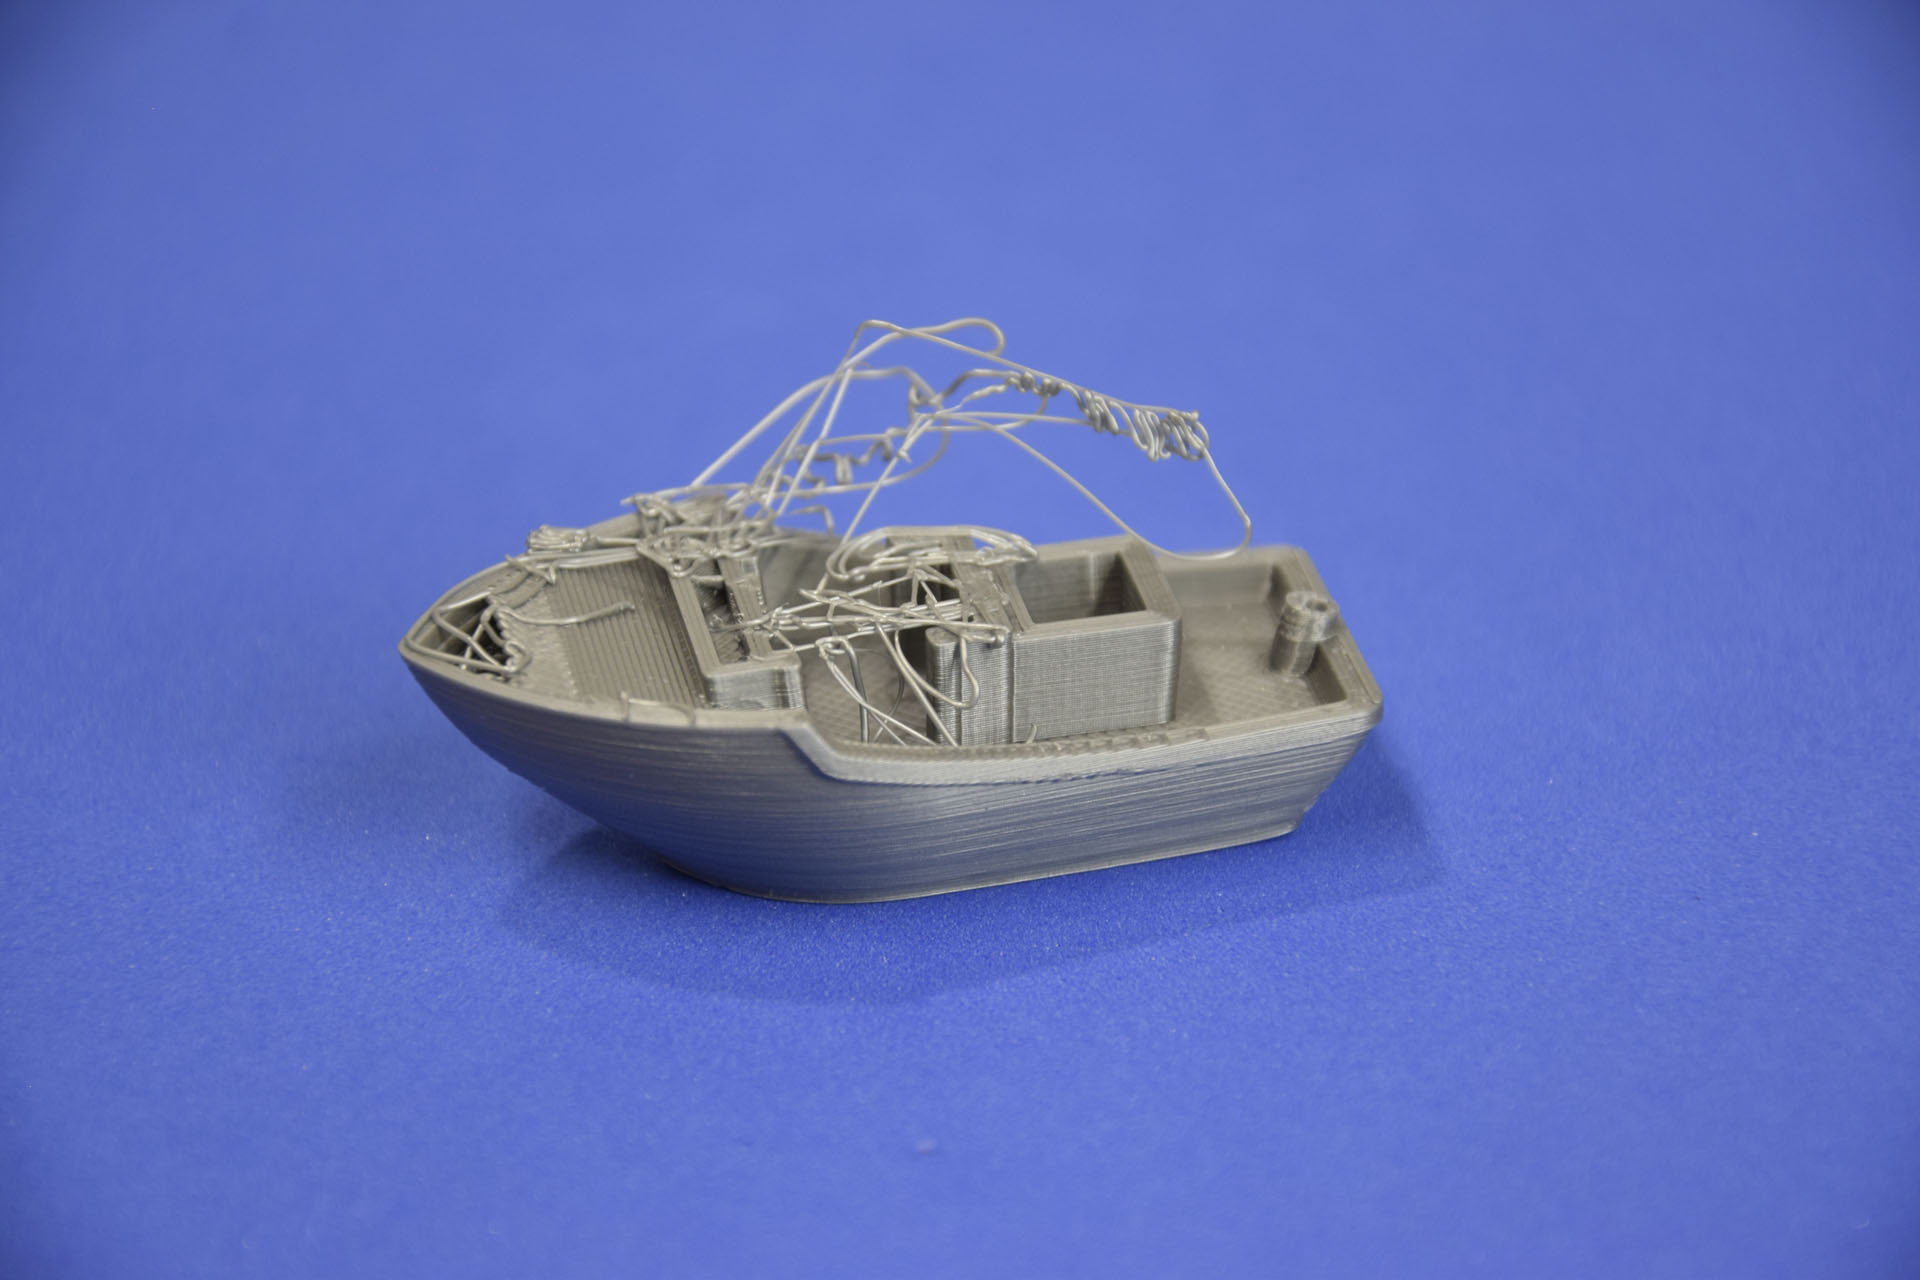
The first layer will make or break the final print. If the first layer does not print at the right height, the print will either have a little squash at the bottom of the model (known as “elephant’s foot”) or it might not stick to the build plate (which is disastrous – see the image to the right).
Calibrating the first height varies by model, but with the Prusa you can use the “Live Adjust Z” setting. Unfortunately, I found the instructions to be a little vague, especially for someone that is brand new to 3D printing, so I wasted a lot of time trying to get it right and I still ended up with a setting that was too high.
I wasn’t even really sure what was the goal of the calibration! After doing some research online, I found that the final “Live Adjust Z” height should be slightly lower than the height of the first layer. Since the default settings in the Prusa Slic3r set the first layer to .20mm, the nozzle should be at about .18mm when it prints.
Fortunately, I also found a fairly easy way to get the nozzle close to that value:
- Find a piece of paper or card stock that is about .2 millimeters thick (use your calipers to measure!). I found that the two pieces of paper that shipped with my printer together measured .19 mm, so I used those.
- Set the “Live Adjust Z” to 0.00. This is important: the next step ignores the current “Live Adjust Z” setting, so you will end up with a bad setting if you skip this step.
- Tell the Prusa to go to the Home position (Calibration->Auto Home).
- With the paper under the extruder, play with the “Live Adjust Z” setting until the nozzle is slightly catching on the paper. Now you know that the nozzle is about .2mm from the print bed!
You will still need to tweak the settings to get it perfect, but at least now you know you’re close. Just run the Z-Calibration G-code a few times until your print looks good.
Tip 3 – Calibrate your extruder motor
During my research for the first layer height, I found out how to check and calibrate the printer’s extruder motor. The extruder motor pulls in filament and pushes it into the hot end. If the motor is pulling in too much or too little filament, your final print will suffer.
Fortunately, identifying and fixing this problem is easy. I quickly tested my printer with the silver filament from Prusa and found that it was under-extruding by about 6%.
Here is how I tested my printer to get this value:
- Using a marker, measure and mark your filament 150mm above where it goes into the extruder assembly.
- Make sure that the extruder is away from the print bed and pre-heated, then tell it to extrude 100mm of filament (in the Settings->Move Axis->Extruder menu).
- After the printer is finished extruding, measure from the extruder assembly to the mark you made in step 1. Subtract that measurement from 150 to find out how much filament was actually extruded.
If the value wasn’t 100mm (or very close), then your printer needs calibration. Fortunately, this is easy through Slic3r:
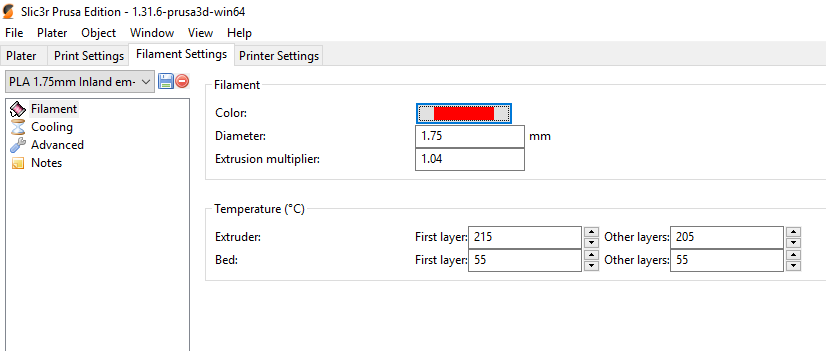
- Calculate the multiplier you will use by dividing 100 by the amount of filament that was actually extruded. For example, my silver filament only used 96mm, so the multiplier is 100/96 = 1.04.
- In Slic3r, go to the Filament Settings section.
- Enter the muliplier from step 1 into the “Extrusion multiplier” value.
- Reslice your model and use the new G-code to print your model.
I recommend testing any new filament you buy. Once you figure out a multiplier for the filament, you should save it as a filament preset so you can easily switch between filaments.
Summary
When I fixed the first layer height and extrusion calibration, my print quality dramatically improved. Check out this comparison:
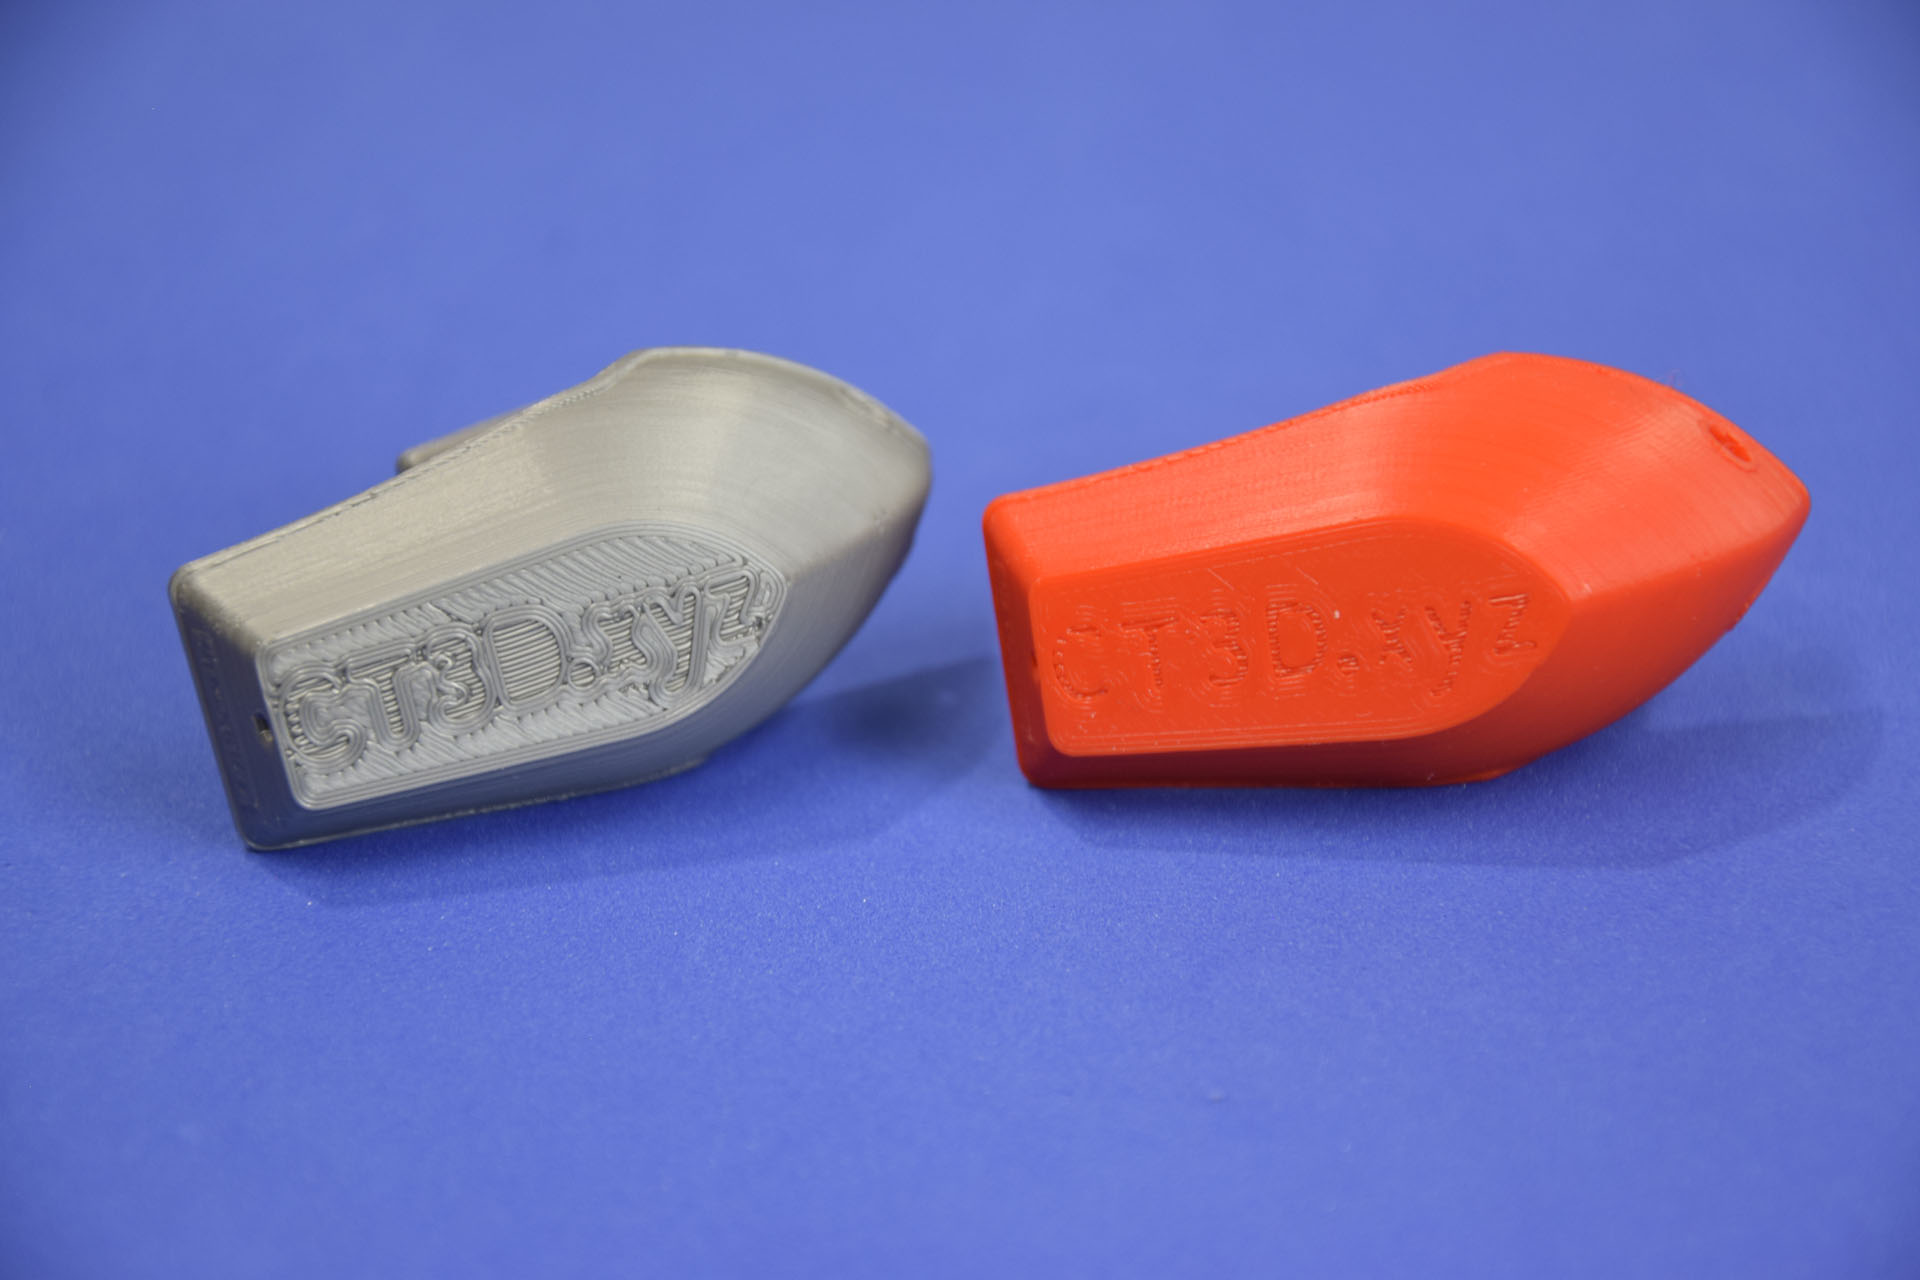
The 3DBenchy on the left was my original print, before I fixed anything. You can see that the bottom layer isn’t fully filled in. And the center of the “D” text actually fell off after printing!
After fixing my settings, the 3DBenchy on the right has a solid bottom layer with no gaps and barely any print lines.
Thanks for following along and I hope this helps you get started with 3D printing! If you have any other tips for people that are new to 3D printing, please put them in the comments below; I appreciate any help in improving my prints.
And let me know what you think of the YouTube video!