If you ever wanted to render an object in LightWave 3D using a cel shaded (aka “toon shaded”) look, you probably considered using Super Cel Shader. LightWave 3D has included Super Cel Shader as part of the standard installation since version 5.5 (in the mid-1990’s).
Super Cel Shader is great because it is so easy to use. You can specify up to four brightness zones on your object based on the amount of diffuse light at each point, and specify a static color brightness to use for that zone. When the object is rendered, each zone will show up as a single color band on the object, creating a traditional cartoon-shaded effect.
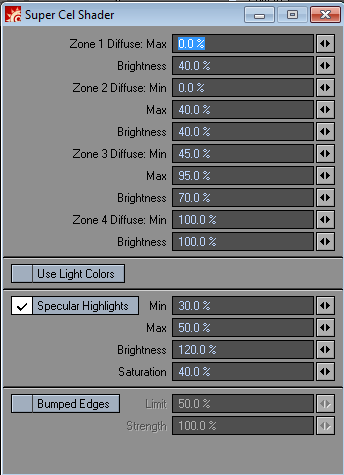
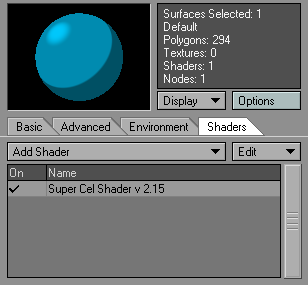
Unfortunately, Super Cel Shader is not very flexible. You have to set it up as a custom shader on the surface, which ends up overriding most of your other settings on the main surface tab. Because you can only specify a brightness value for each zone, that means that you are limited to a monochromatic set of colors for your surface (you cannot mimic dramatic lighting situations). Ultimately, you are only able to control the few settings exposed by the shader dialogue.
But since LightWave 9.0, Newtek has added a node editor to surfaces that gives artists many more options when texturing an object. In fact, the node editor is so powerful that you can replace the basic functionality of Super Cel Shader using only two nodes, and those two nodes actually give you more control over the final output than Super Cel Shader.
How To Create A Cel Shader Using The Node Editor
- Open the node editor for the surface.
- Create a “Lambert” node (Shaders->Diffuse->Lambert).
- Edit the Lambert node and set the “Color” to pure white (255, 255, 255). Make sure the “Diffuse” is set to 100%.
- Create a “Gradient” node (Gradient->Gradient).
- Connect the “Color” output of the Lambert node to the “Input” of the Gradient node.
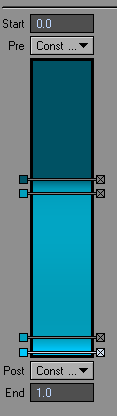
- Edit the Gradient node to set your color bands. To create a similar set of bands as Super Cel Shader, I used these keys:
- Position: .4, Value: (1, 83, 101)
- Position: .45, Value: (3, 159, 189)
- Position: .95, Value: (3, 159, 189)
- Position: 1.0, Value: (1, 200, 252)
- Finally, connect the “Color” output of the Gradient node to the “Diffuse Shading” input of the “Surface” node.
- Render your cel-shaded object!
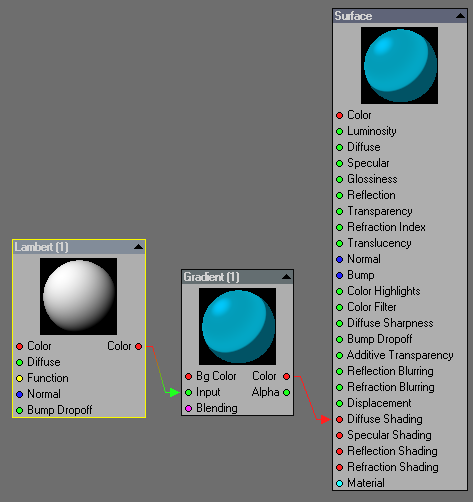
Super Cel Shader also lets you add highlights to the cel shaded output based on specularity. You can duplicate this using two more nodes: add a Phong node (Shaders->Specular->Phong) and another gradient. The Phong node provides the raw specular data for your surface, so if you run it through the gradient you can control the specular highlights before connecting the final output to the “Specular Shading” input of the “Surface” node.
As you can see from this simple example, using these nodes gives you much more control over the final output. You could use completely different colors for the each band, you can setup as many bands as you want, you could even use other textures/nodes as inputs to each band! That is what makes the node editor so powerful, anything that can be connected can potentially be used as a viable solution.
Let me know if this helps you or if you have any questions!