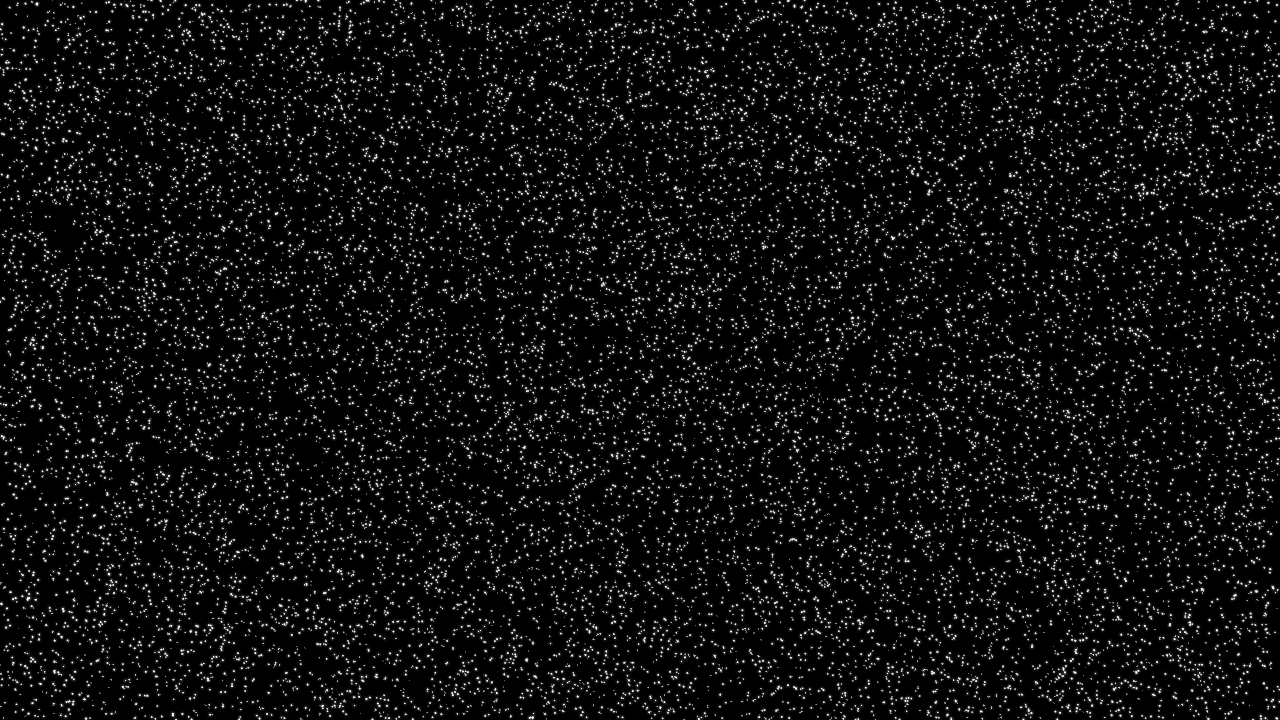
In LightWave 9.6 and earlier, I knew how to make a simple star field in LightWave using one-point polygons. But I was always bothered by a limitation of that technique: each star has a maximum size of one pixel when rendered. A star field would look much more realistic if some of the stars were bigger than others. Also, I recently discovered that one-point polygons do not work well with transparent objects in front of them. For instance, in my 3D Earth tutorial, the atmospheric glow around the earth would completely obscure any stars, even at the outer edge of the atmosphere where the transparency is nearly 100%.
After playing around with instancing the other day, I realized that LightWave instancing could provide a much better alternative to surfaced one-point polygons. After much testing, I found an elegant solution that only uses two objects. Using a single luminous sphere and creating many instances of it far from the camera, I can simulate a simple star field.
I created two simple objects for my scene: a low-polygon small sphere (1m radius, 12 sides, 8 segments) and a medium-polygon large sphere (10km radius, 24 sides, 12 segments). I inverted the polygons of the large sphere, so the polygons face inwards, and set the surface to black. I surfaced the small sphere to a bright white with 0% diffuse and luminosity turned to 100%.
Using similar settings from my previous post, I applied the small sphere as an instanced object to the large sphere, which is the instance generator. I created 1,000,000 star instances, randomly distributed across the surface of the large sphere. I also applied a random Scale effect from 100% to 500%, to vary the size of the stars.
Before rendering, I also applied a 10% glow to the small sphere’s surface and enabled the glow effect in the “Processing” tab (control-F8). The intensity is set to 50% and the Glow Radius is set to 3 pixels.
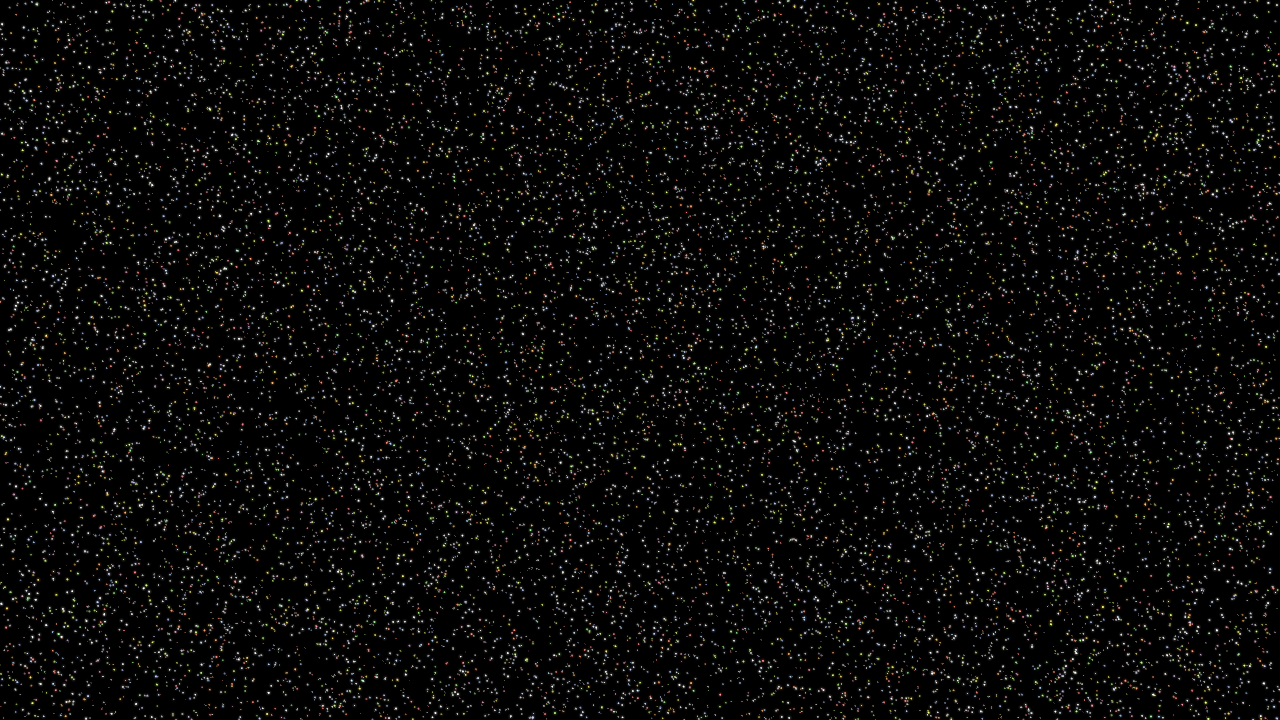
The resulting render is a good start, but the first thing I want to improve is the color of the stars. In my old approach, I could create as many colored stars as I wanted, as long as I was willing to take the time to manually create those one-point polygons and assign a different surface to them.
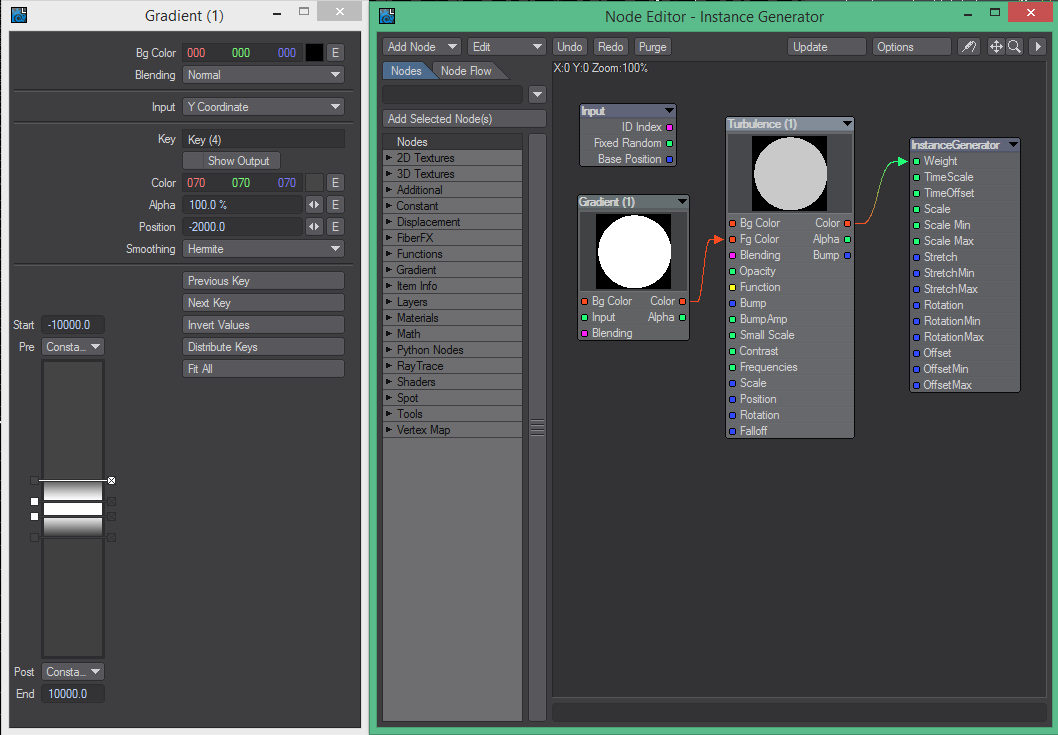
Fortunately, instancing can let me dynamically assign different colors to the stars without creating new instances or surfaces. In the Node Editor for the small sphere’s surface, you can access each individual instance information using the “Instance Info” node. That node has the index ID of the instance (which is the integer number of that particular instance – for instance, the 99th sphere out of 1,000,000). It also has a “Fixed Random”, which is a fixed floating-point number between 0 and 1 that is unique to that specific instance.
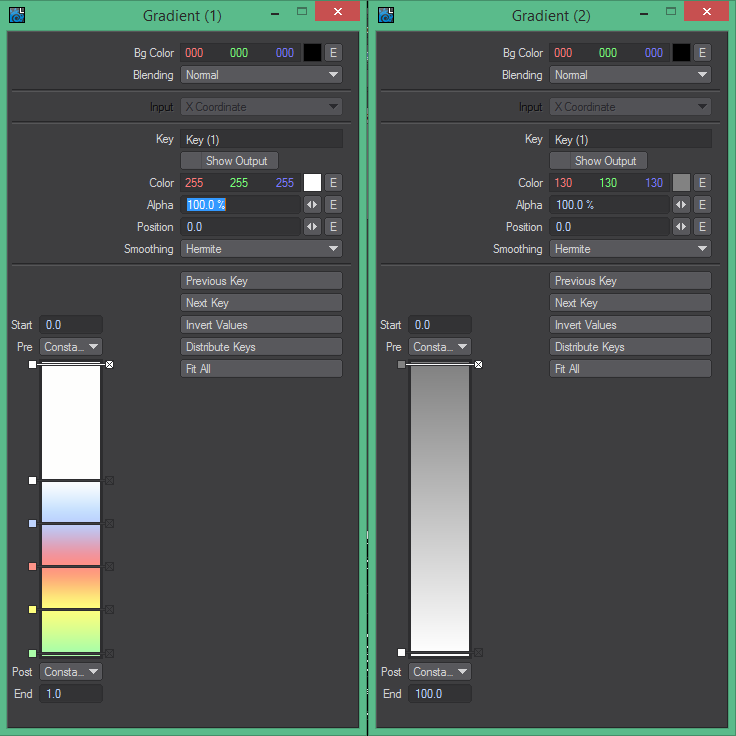
I used the “Fixed Random” and a gradient to assign a random color to each star. The LightWave manual has the details for this technique, so if you want more details than the screenshots below, you should read that section in the documentation.
I also wanted to randomize the brightness of the stars, but I couldn’t use the same “Fixed Random” for that value. When I tried that, all stars of the same color had the same brightness, which was not the effect I wanted. Instead, I used the “ID Index” value and ran it through a “Mod” (modulo) math node set to 100, so that each ID was stripped down to a number between 0 and 99 (inclusive). Then I used that as input to another gradient that had a grey-scale ramp, which was finally multiplied by the color from the first step. That final output is connected to the “Color” value of the surface.
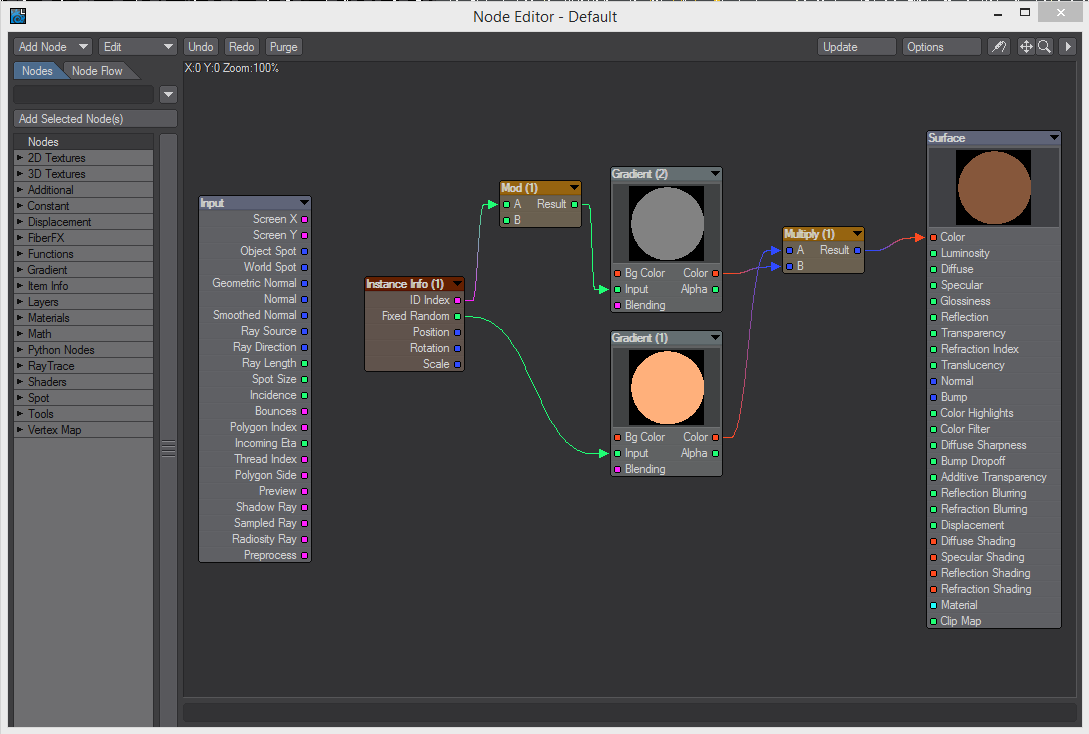
The result is improved, but I do not want the distribution of the stars to look so uniform. When you look up at the night sky, some areas have a higher concentration of stars than others (especially when you get to the Milky Way, which is a band of highly concentrated stars). Luckily, LightWave has a setting that controls the distribution of the instances: “Weight”. I will not get into the gory details about how it works (the LightWave documentation covers it very well), but it is important to know that you can control the weight on the Instance Generator options. You can either use the “Weight” value in the main settings and set a texture to control it, or you can go to the “Nodes” tab on the Instance Generator and connect a node network to the “Weight” value. I chose the latter approach, since I am much more comfortable with creating nodes.
I used a simple gradient to create a more concentrated band near the XY plane and ran it through a turbulence node to add some variation across the entire sky.
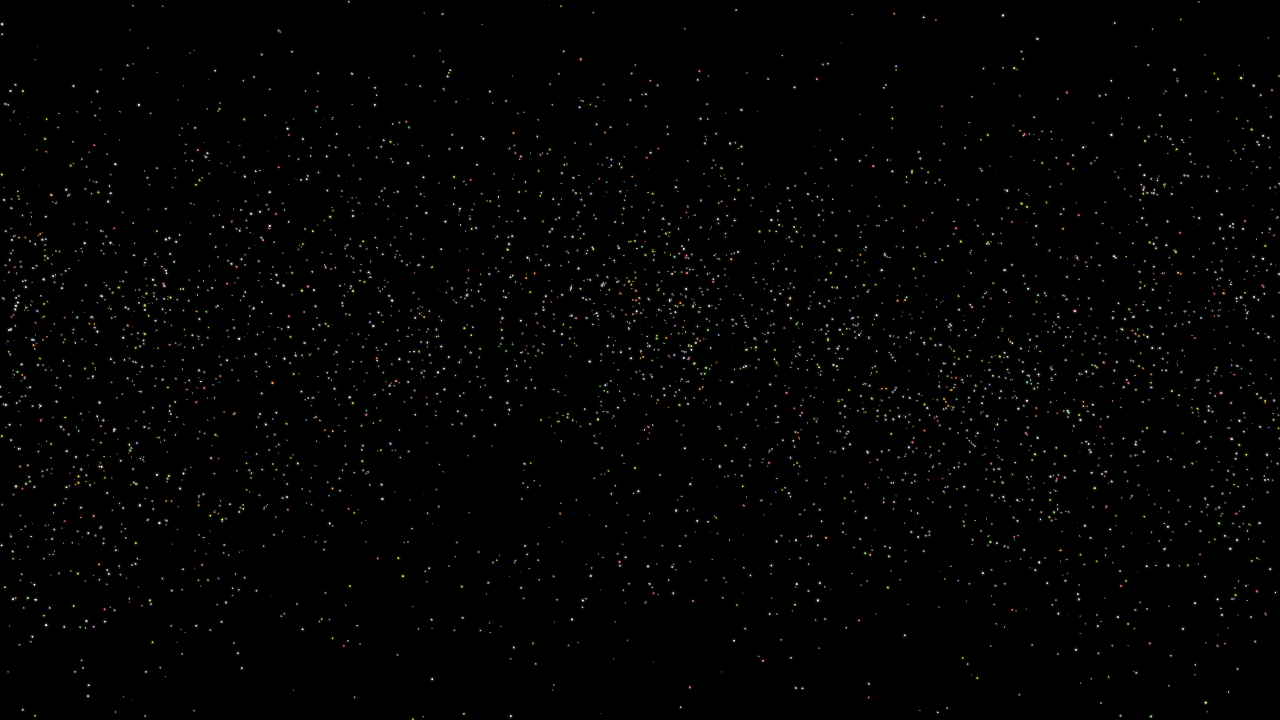
The final result is pretty good for a first attempt, but I still want to improve it. I want to try to get more stars in the main band (a lot more), so I might try to use a second generator to create small stars just in that area. I also want to try to get some stellar gas effects in the sky, although I am not sure yet how I will accomplish that task. In my old approach, I added some nebula effects using a large curved surface and an image map I created in Photoshop. I want to create something similar within LightWave, but I need to do more research on the new tools available since version 9.6.