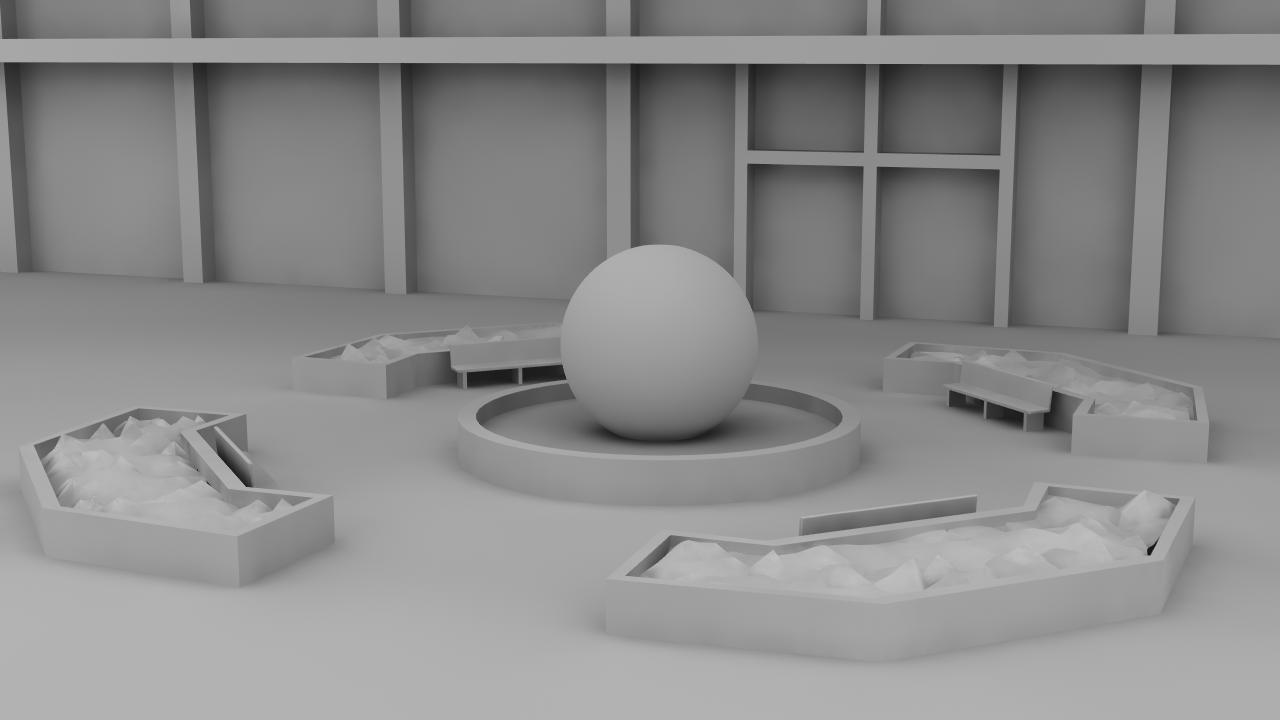
A “clay render” is a simple lighting and surfacing combination for an object or scene that causes the objects to look like they are made out of clay. Clay renders are often used to view or show off the geometry of an object without the distractions of the various surface colors.
Directions (for a single object — if you already setup your own scene, skip to step 3):
- Add a “floor” object to your scene. If you don’t already have one created, use Modeler and create a large flat square named “Floor”.
- Add your object and arrange the object so it is resting on the floor.
- A clay render requires that all of your objects are a uniform gray color. Edit all of the surfaces on your object and set the following values:
- Color (r,g,b): 200,200,200
- Luminosity: 0
- Diffuse: 100
- Specularity: 0
- Reflection: 0
- Transparency: 0
- Translucency: 0
- We need to disable the default lights, so open up the properties of the default light. Set the “Ambient Intensity” to 0%.
- Open up the Scene Editor, find the default light, and uncheck it so it does not affect the scene (see screenshot below). This is better than turning the light’s intensity to 0%, so you can still view the lit objects in Layout.
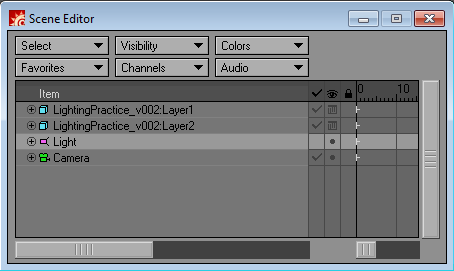
Disable the main light in the Scene Editor so it does not render but still lights the scene in your OpenGL display. - Open the Backdrop properties (control-F5) and set the “Backdrop Color” to pure white (255,255,255).
- Open the “Render Globals” dialog, choose the “Global Illum” tab, and enable “Radiosity”. You can leave all of the defaults for now.
- Finally, increase your camera’s Anti-Aliasing settings (if desired) before you render the result.
Here is an example of a simple scene I am working on now:

Tips:
- To improve the accuracy of the render, decrease the “Minimum Pixel Spacing” (in the “Global Illum” tab of “Render Globals”) and increase your anti-aliasing settings of your camera.
- To reduce the contrast, increase the “Indirect Bounces” value in the “Global Illum” tab of “Render Globals”. This will allow light to bounce off the floor and lightly illuminate some of the downward-facing geometry, giving more even light to the scene. Example: